Long Story Short

DSCN1266 - Edited (1)

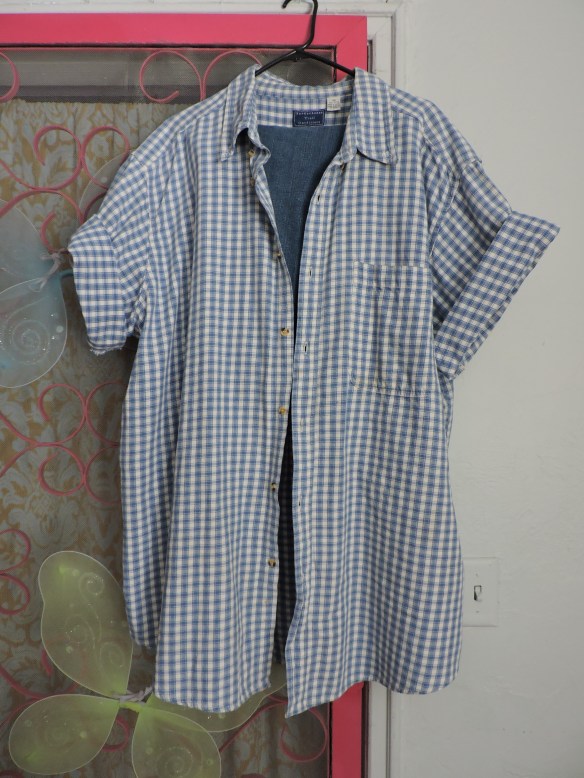
Leave it to me, I didn’t take a picture of this shirt before I lopped the sleeves off.

I was headed off to meet someone new and wanted something to wear better than some of the usual suspects in my repertoire of options. I usually wear my bag-lady clothes that can stand dirt, algae, paint, limb snags and cat claws. This is a shirt I love. I’m a gingham nut and love long, flowy things. It seems to seldom come out of the closet because it is either too hot or too cold or I don’t have somewhere to go that dressing better is called for.

It was way too hot for long sleeves so they were lopped off and what remained was rolled up. A drop of coffee was spilled on the front right before it was time to leave so a big patch of wet went with us as Shirt and I flowed out the front door on our way to go. It was dry before I got there because it was just that hot.

Anyhoo, sleeve it to me to forget a picture of it with the sleeves on.

Years ago, some other sleeves were lopped off a favorite shirt and made into a little handbag. See a little bit about how that handbag came to be here if you want to: http://ces-tsibon.blogspot.com/2011/05/color-purple.html

Some of the rest of the shirt became a pillow and some of it still remains in Resource Central to become something else at some point later.

I loved that shirt. Can’t remember why it got cut up.

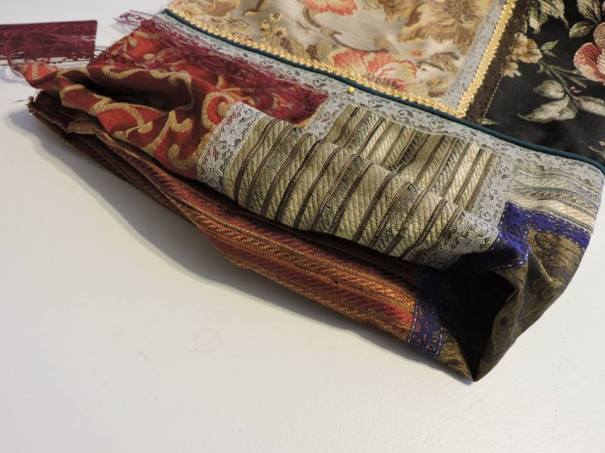
The plan is now to take these blue gingham sleeves and make them into another little handbag just suited to go like an outfit with Shirt…

Both sleeves will be used together somehow to create compartments. One was slipped inside the other to see where they may want to go.

This is as far as the handbag got once Lucy wanted in. Everything had to be put away to make all space safe for her. She’s the most important thing. MickeyMouser too — but he didn’t want in and seldom does now that he has the studio and a little catio, right outside of that.

Some of the other little projects going on as of late:

A pre-cut package of 5″ squares from Darlene Michaud were ordered from her Ebay shop sometime back. I just love what she does with things and some of the fabrics that she uses. It was a random pack of odd balls. They were separated by me to be little groups that seemed related. The more modern ones, lying on the plate, have high hopes of becoming a postage-stamp-sized quilt that might make Barbie and Ken happy for their bed.

The window blinds were washed real good outside lately and the Waverly fabric panels that had been hanging over them on each end were also taken down to wash. Meanwhile a king-sized thrift store sheet was split to pin up on the ends to filter light when the slats are opened. I’m not at all happy with too bright of light. I was a little tired of the Waverly print anyway and especially now that things are being really fine tuned to be just the way I want. Now the thought is that the stripe will be the lining for some patching of old hankies and other things to be pieced to be on top of.

We’ll have to wait and see. I’m chomping at the bit but getting things in order has to stay at the front of the queue.

The door opening panel was taken down as well. It’s was a finished piece that really needed to be hung from close to the ceiling because it is so long — but the brackets for the rod came out of the holes they were hanging from and it has not been fixed. Some of the yo-yo quilt pieces that have been stitched together are simply hanging on a tension rod there in front of a piece of sheer just because I like to look at them. The balloon thing is just me playing with a remnant piece of fabric I like there to see what it might become. It too, would need to be hung way higher up if it is to stay there. Time to get some toggle bolts out to make the rod stable from those drilled out holes. There had been wood brackets there. I could always glue a piece of wood to the wall that the brackets could be screwed too? 

Long story short, the things in the studio are coming in and put into see-through tubs so the kitties have that space without any of my fear of them messing things up.

Some T-shirt yarn in one of the tubs inspired me to make a new hanger for a newly gifted succulent plant.

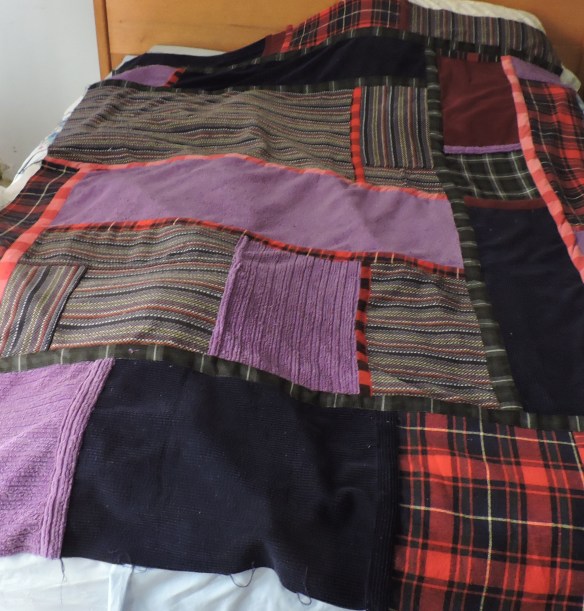
As soon as the bedroom floor is painted and that room is cleaned up for real, I shall lay the nearly finished housecoat blanket out again for you all to have a look see. For now, this is all that’s on offer because the rest around the edges of the bed are way too messy to show.

Patches

And that’s about that.

Sewing is uplifting and uplifting is what we are so much in need of so sew, sew, sew! Keep your happiness high.


Advertisement

Little House Comforts

So, the idea for this crocheted blanket was inspired by watching Darlene Michaud‘s video about making a scrappy afghan. It was started with whatever was on hand, (mostly things purchased years ago for making Raggedy Ann hair). It was quickly realized that that would not be enough. Because thrift stores were closed that minute and there was an urge to continue rows that would integrate new colors without waiting any longer, some selections from Walmart were procured.

Soon enough, a hoard was brought from two thrifts to consider for this project along with the Walmart offerings. At first, it didn’t seem desirable to use second hand yarns of which there was no way to know of where they came, (animals, hair, smoke), but realizing the thing can be washed — so it advanced.

And advanced and advanced and advanced. Lots of thought, (aka: intuition), went into which colors to use when and there were even a couple of times that rows were unraveled because they didn’t suit the ‘artist’. The worst event was a time working in compromised lighting when ten rows were unraveled after seeing them later in better light. It had to be done. It couldn’t be lived with.

A row of slip stitches were done in a purple with a glitter thread running through it combined with a maroon. Did she forget to tell you that the whole thing was done with two strands of yarn all the way through? It was. It makes for a very heavy and tight warm blanket. A single crochet was used as well, all the way through, except for the starting chain and the row around the edges for the border, which started with the slip stitch. The single crochet to finish it off was with the maroon and a navy, single crocheted.

It might be made better proportions with a few more rows of width and that could always be done — but, as it turns out, this is wanting to live in the mudroom and works perfectly great as a blanket while lounging on the sofa watching VHS movies in that little comfort room.

After finishing the crocheted blanket and realizing it wants to live in the mudroom, another blanket was wanted for the bed. After utilizing old housecoats as a temporary fix, the idea to make them into a blanket, patchwork style, seemed to be a perfect solution. So here we go with that adventure.

First to do was to take them apart to retrieve usable flat fabric for making patches. Everything is saved for doing something else with as ideas unfold — and they unfold as the cutting is ensuing.

The larger image in this grid is the flat pieces that can be used for making patches.

The seams have always begged for using to create fringe. There is a bag somewhere just waiting for a project like that and these can be added to it.

The cuffs on the sleeves turned out to be just the right diameter to go around a head so can be imagined to be used for warming ears. A piece of elastic might make it more convenient and they could always be trimmed up with embroidery or some sort of embellished or passementerie.

These days approaching spring are a little unpredictable, as all weather is it seems. Recently chilly temperatures have been begging for more and warmer blankets so that the heating bill can be a little less.

The purple got cut out last night and everything went into the sewing room where it could be closed off from any curious kitties.

DSCN9617

It will be fun to see where this all ends up. Original thoughts were of doing a ragged edge for seaming, but instead it is going to be flat felled so that it will be a little more reversible.

Trying to make little house comforts with what there is in stock in the little house. Both of these housecoats were second hand to start.

“Use it up, wear it out, make it do or do without.”

And so the story goes.

Thanks for stopping in.


Kind Of Carpetbaggish

This is the process of making a thing (pictures):

This is how they were laid out ready to stitch but…
somehow I managed to create a gap…
…so I went rummaging for something to span the gap
I think I like it better this way
As I was going along, the thought was that it would be a cushion; but I’m stuck on the bag idea for awhile me thinks.
It’s going to be a big one.
Rummaging around in search of a lining for this bag, I ran across these pant legs that were cut off for shortening some for a client. The hems cut off can be used for handles or for a casing to run elastic or a cord through at the top.
Often dress pants are a mile long to allow for altering; perfect for lining this. The taupe/olive drab seem to be the winners. Those cuffs give me anxiety. I hated cuffs. Charged extra for them.
I pulled out a collection of trims to think about covering the raw edges where pieces were joined. Some of the trims in #ResourceCentral date back as far as 1969. The cellophane cover was of better quality then too. More recent ones just crumble off. These were still very intact. I’m blown away by their guarantee; unheard of in today’s market.
So every time something is added, things need to be reaccessed. It doesn’t pleat as softly now with the trim applied and it feels like it still needs something. I added the string of silk roses because it popped up while rummaging and seemed to be a thing I wanted on this.
Not sure at this point which will be the front. Perhaps it won’t matter on this one.
I’m going to square off those pointed ends. I should have applied that piece before the side ones so was trying to finish it off neatly.
The piping was stitched on by machine, but all the lace was hand stitched with gold floss in a running stitch.
I’m rethinking the pleats. May do a soft gather or take the pleats out to the seams.
It was late when I added the purple and lighting was poor. I had seen it in the bright light and knew it was a risk; but intuition forced me to add it. We’ll see how it works itself in.
As with most things, I’m not sure if I like it at this point. So many times, clients would literally freak out at the time of installation of a decor redo. I would always tell them to sleep on it. Never had anyone remain freaked out. Change is hard. Most things just need a little tweaking to make them perfect or time to adjust. Wall colors were an especially big challenge. Especially men as most of them want white.
Some gold gimp was added around two of the patches. Adds to the texture and integration of colors; I think. Also added a piece of purple so that it shows up on both sides.
I’m really liking the pleats out on the sides and the whole thing is growing on me.
Found another color of lace trim…??
Wasn’t liking the pointed ends on the bottom but didn’t want to square them off. After adding the lining, I will simply tuck the seam in like a pleat and stitch along the seam to anchor it to the bottom.
Pictures are posted so that I can remember the process should I want to repeat it or teach it to someone; so, forgive if redundant or seem unnecessary. There are details that I want to remember.
This allows for it to remain able to puff out but gets rid of the points at the bottom
The pleats at the top are more complex
The lining will be made the same dimensions and attached so that a portion of the top is able to flop open. This is a deep bag and this will make access easier and the opening bigger. I imagine some kind of a dowel along the top edge with the straps running through the fabrics, under the dowel and back up long enough to go over the shoulder.
I fixed one corner of the gray trim to have the same miter slant as the other so now it looks more like a frame and am adding a row of purple embroidery stitching at the bottom of the lace to help it differentiate from the fabrics under it.
This piece was added in to the collection that constituted the inspiration box as when I put all the pieces together, I managed to space them wrong and needed to add something. Turns out to be one of my favorite pieces and I love where it ended up. It shows up on both sides so gives the bag continuity.
The front mostly complete. A few little details to add.
This is the back of the purse face fabrics.
So now for the lining. These were lengths cut off of a pair of mens dress pants. As you can see, the pieces didn’t cover the width of the purse face fabrics and were way longer than needed. That was cut off and used to splice pieces to compensate for the width issue. It just barely made it; almost too perfect. Phew!
The two ends were stitched together and the edge finished with a stretch stitch.
After evening off the two pieces that were cut off from the length, it was just exactly a fit. Now I’m trying to add a pocket before attaching the lining and also trying to figure out how I want to make the opening. I’ve got an idea for dowels but still trying to work it out.
This striped fabric was a pillow cover I got for a song at a dollar store and cut up to use otherwise. I have PLENTY of pillows.
Another piece cut of of a pair of mens pants.
It isn’t quite deep enough so I will either cut off to match the lining or just roll the edge over to the lining side?? I got in a hurry to see how it looked and didn’t press the pants fabric. Will do.
one of the first images that came up for the search term “Carpetbaggish”
Mary Poppins bag

To view this story in pictures instead, click this link. This post is a compilation of the descriptions on the images.

Mary Poppins bag