Kind Of Carpetbaggish

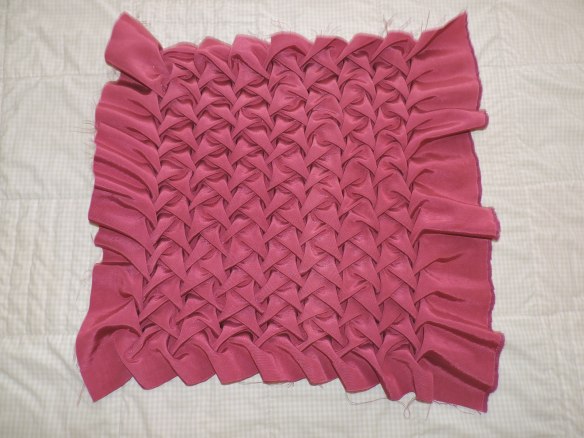
This is the process of making a thing (pictures):

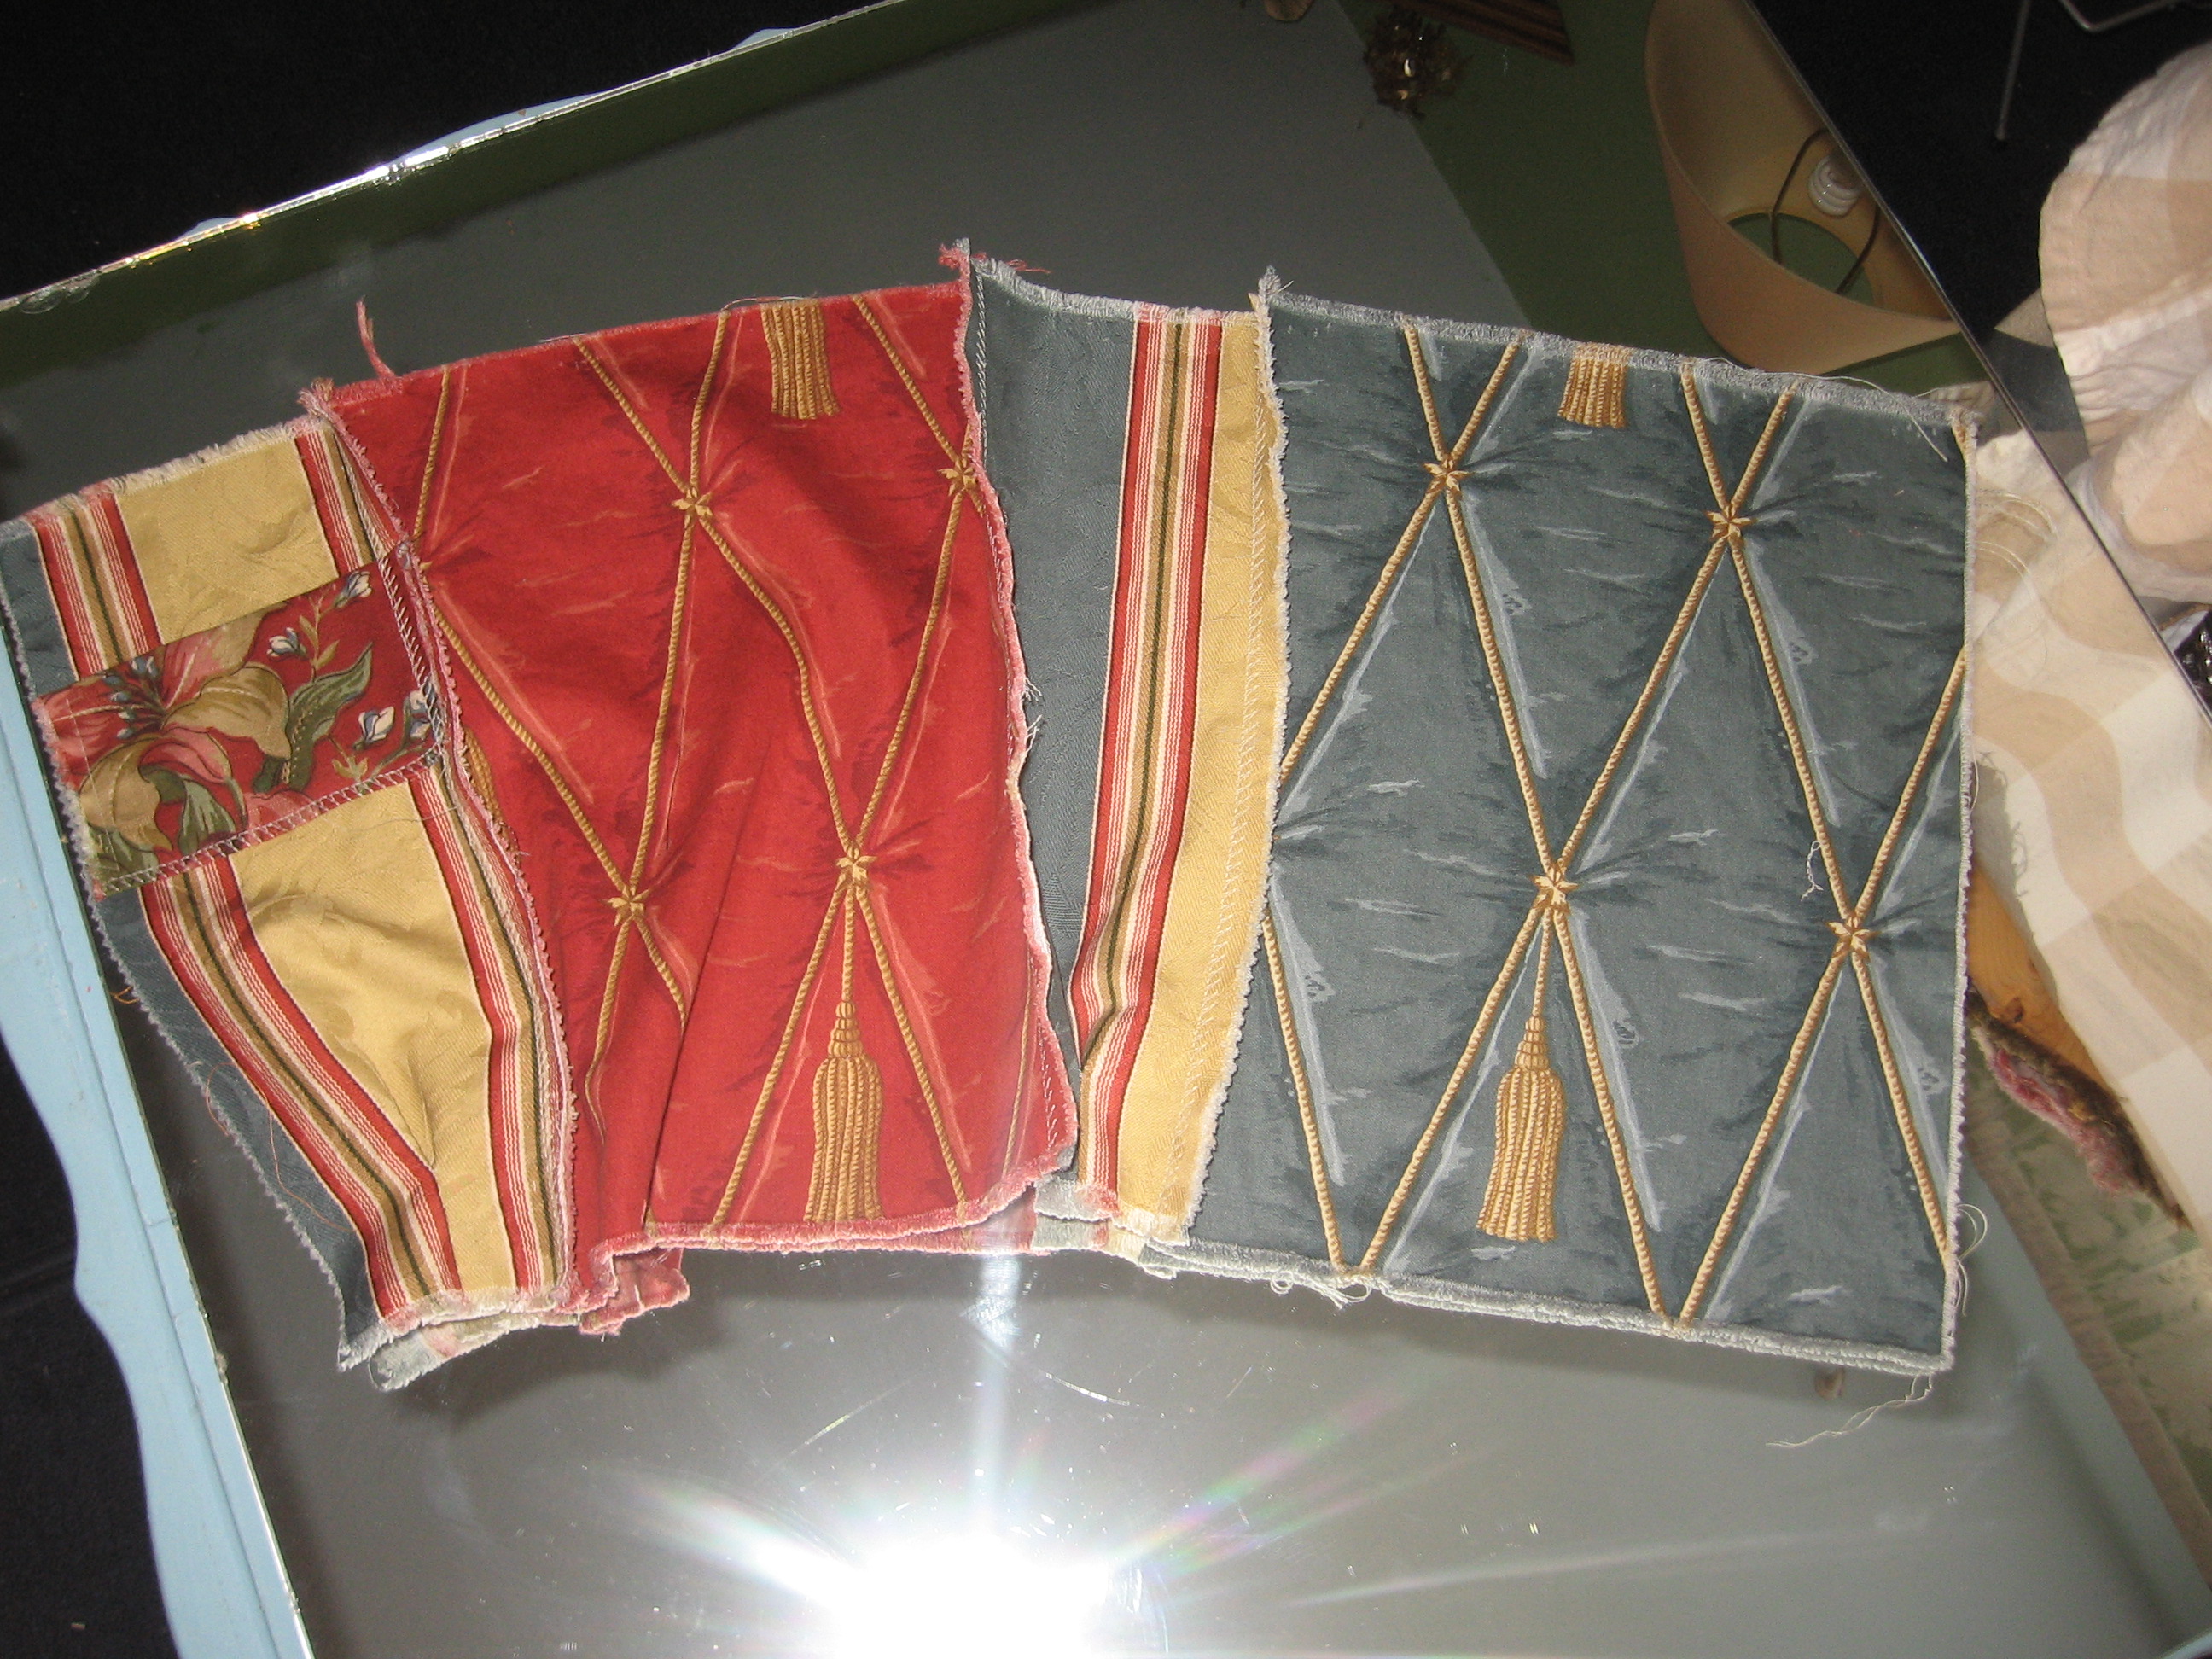
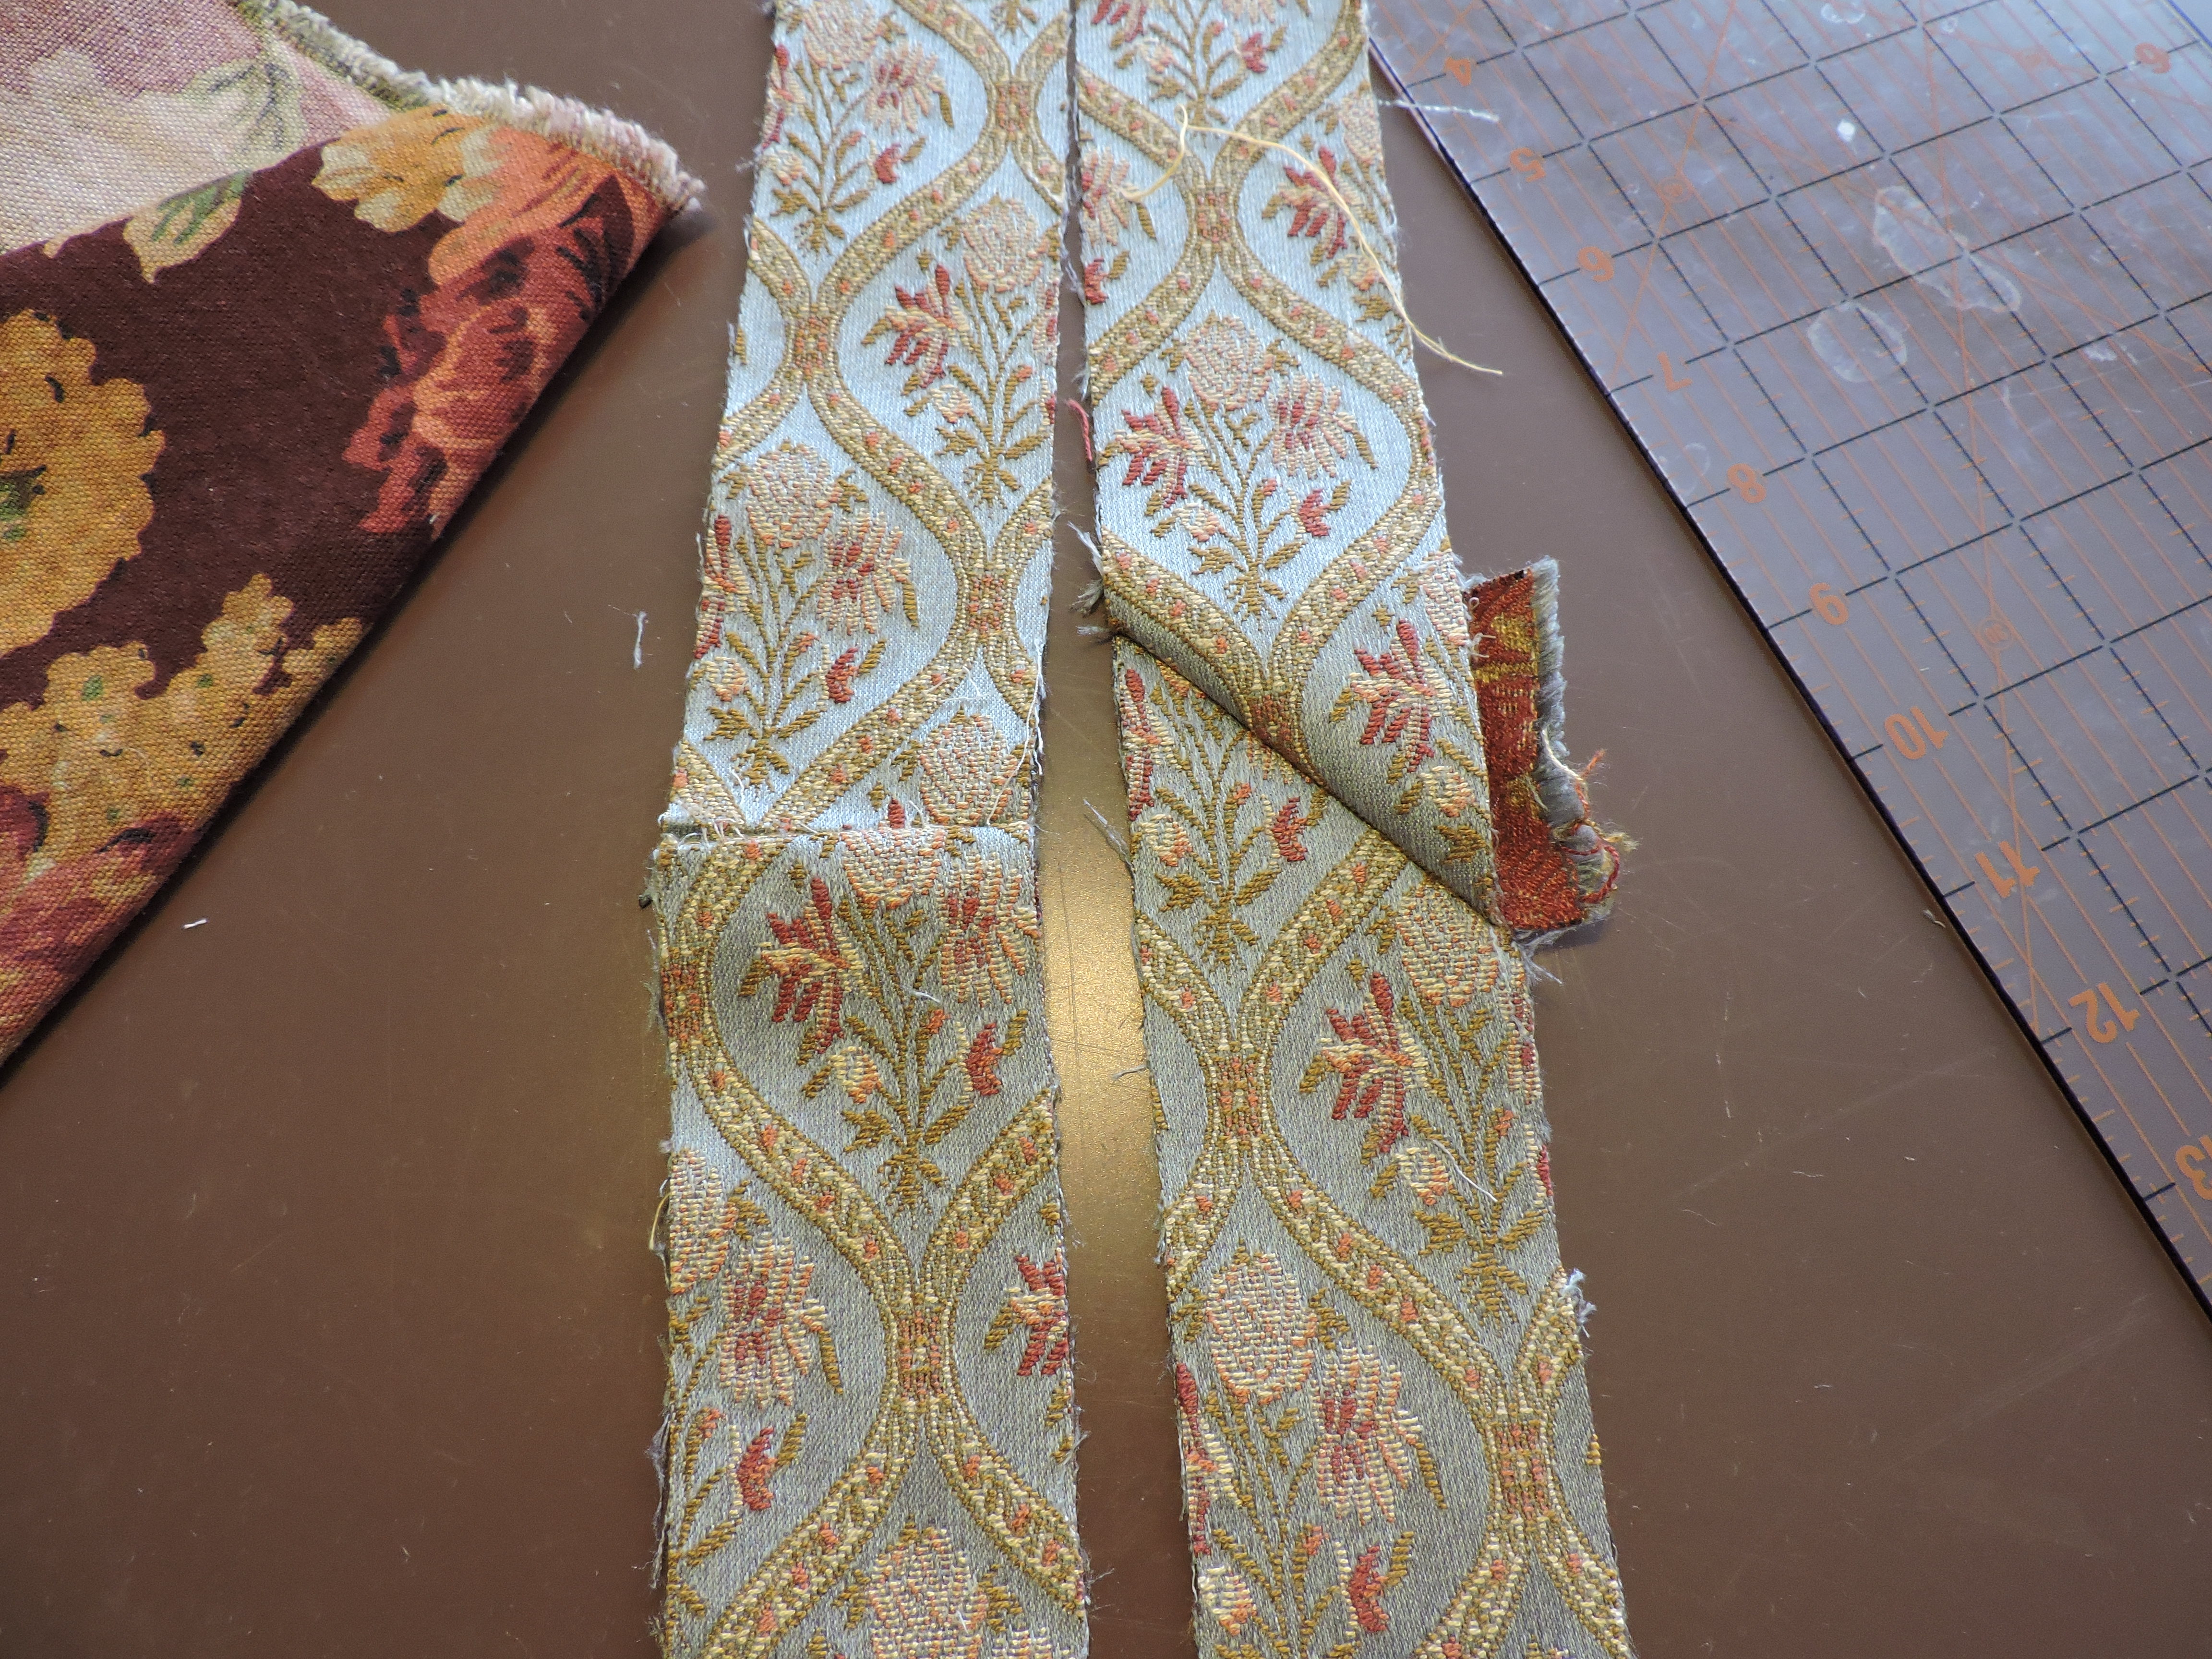
This is how they were laid out ready to stitch but…
somehow I managed to create a gap…
…so I went rummaging for something to span the gap
I think I like it better this way
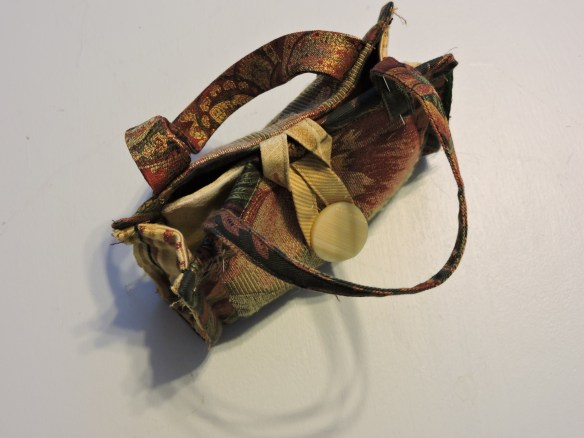
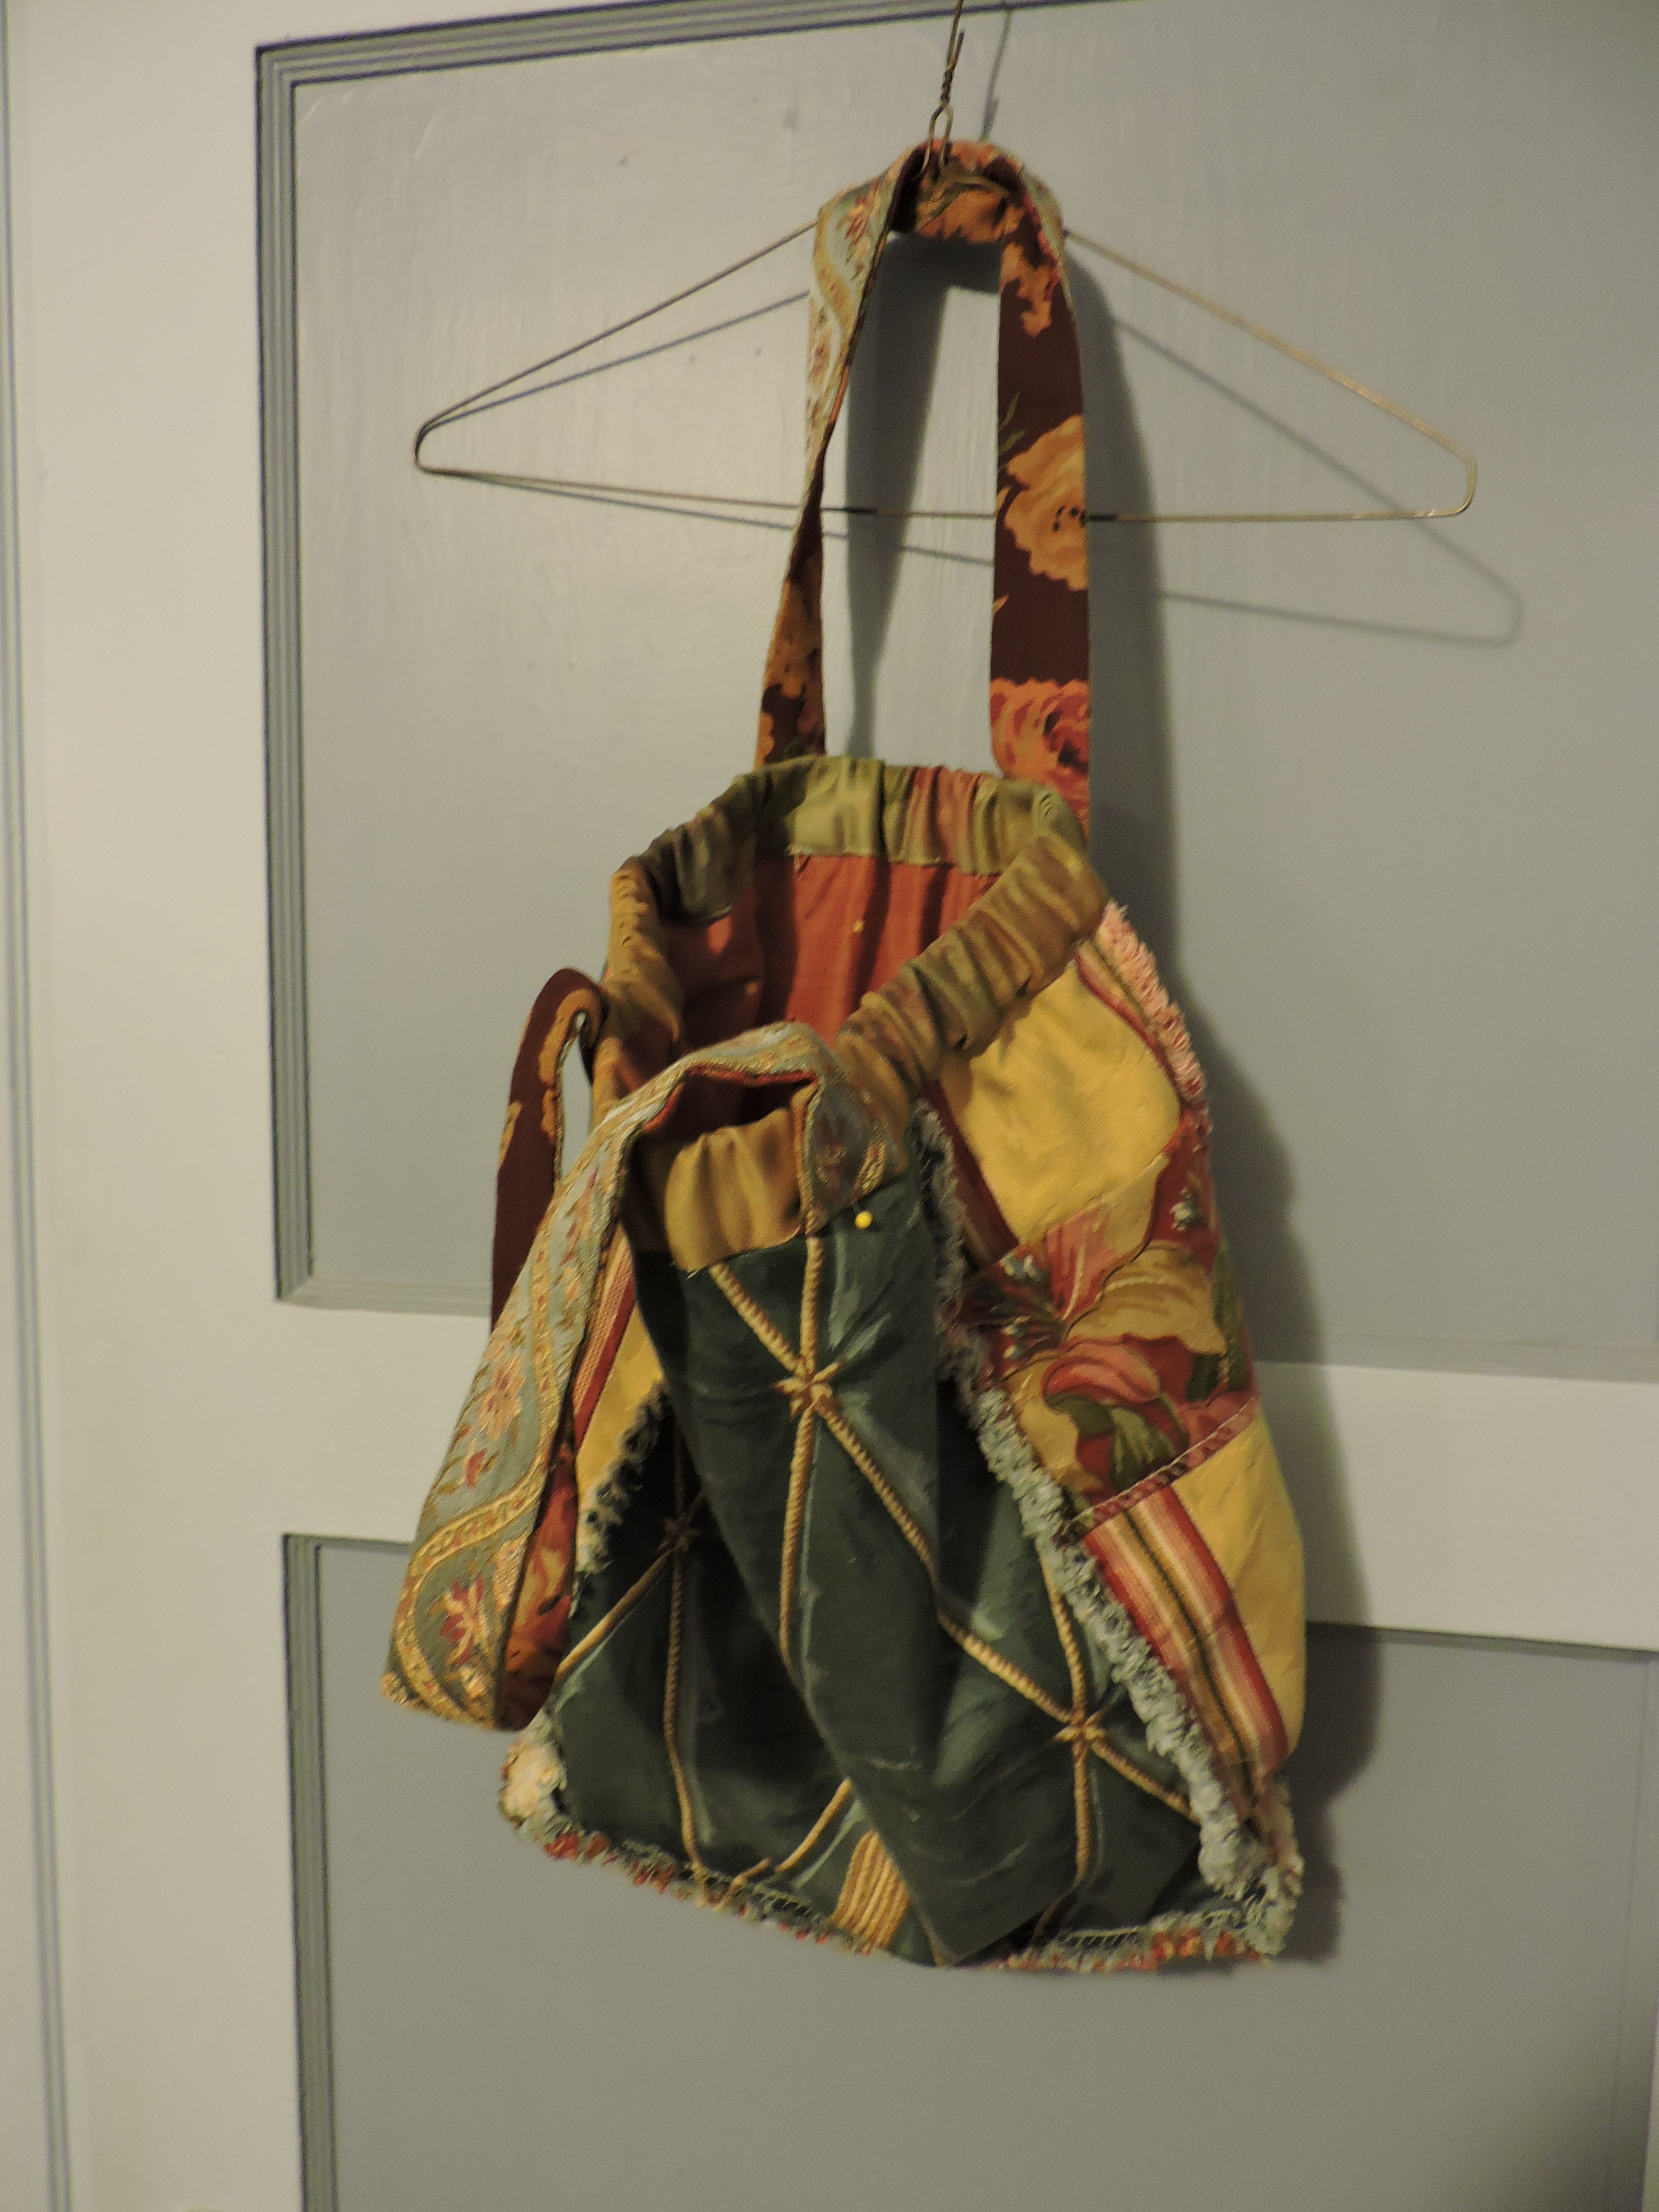
As I was going along, the thought was that it would be a cushion; but I’m stuck on the bag idea for awhile me thinks.
It’s going to be a big one.
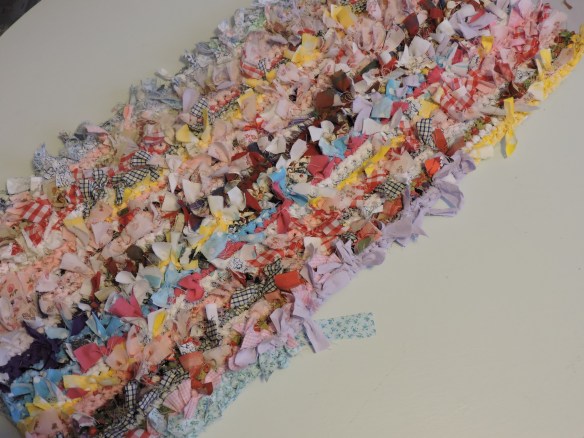
Rummaging around in search of a lining for this bag, I ran across these pant legs that were cut off for shortening some for a client. The hems cut off can be used for handles or for a casing to run elastic or a cord through at the top.
Often dress pants are a mile long to allow for altering; perfect for lining this. The taupe/olive drab seem to be the winners. Those cuffs give me anxiety. I hated cuffs. Charged extra for them.
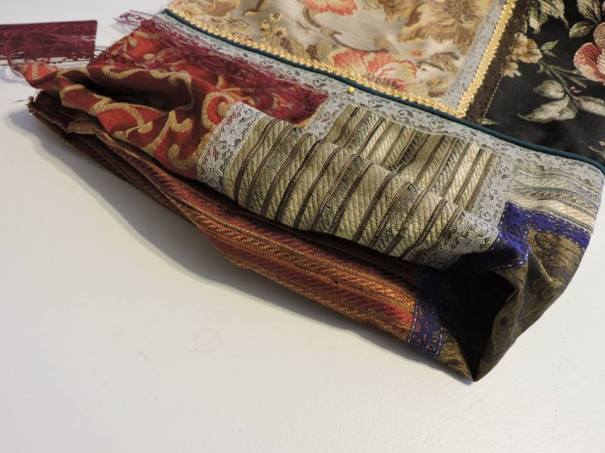
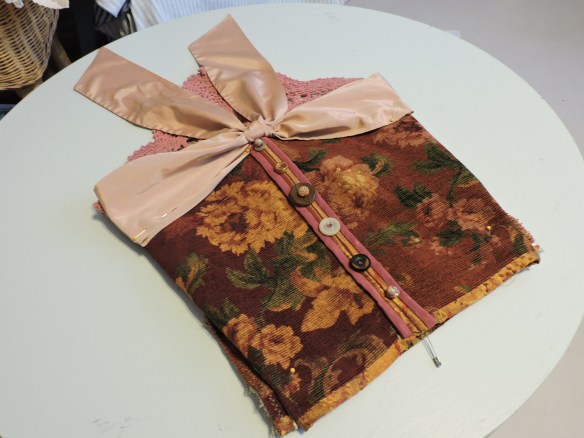
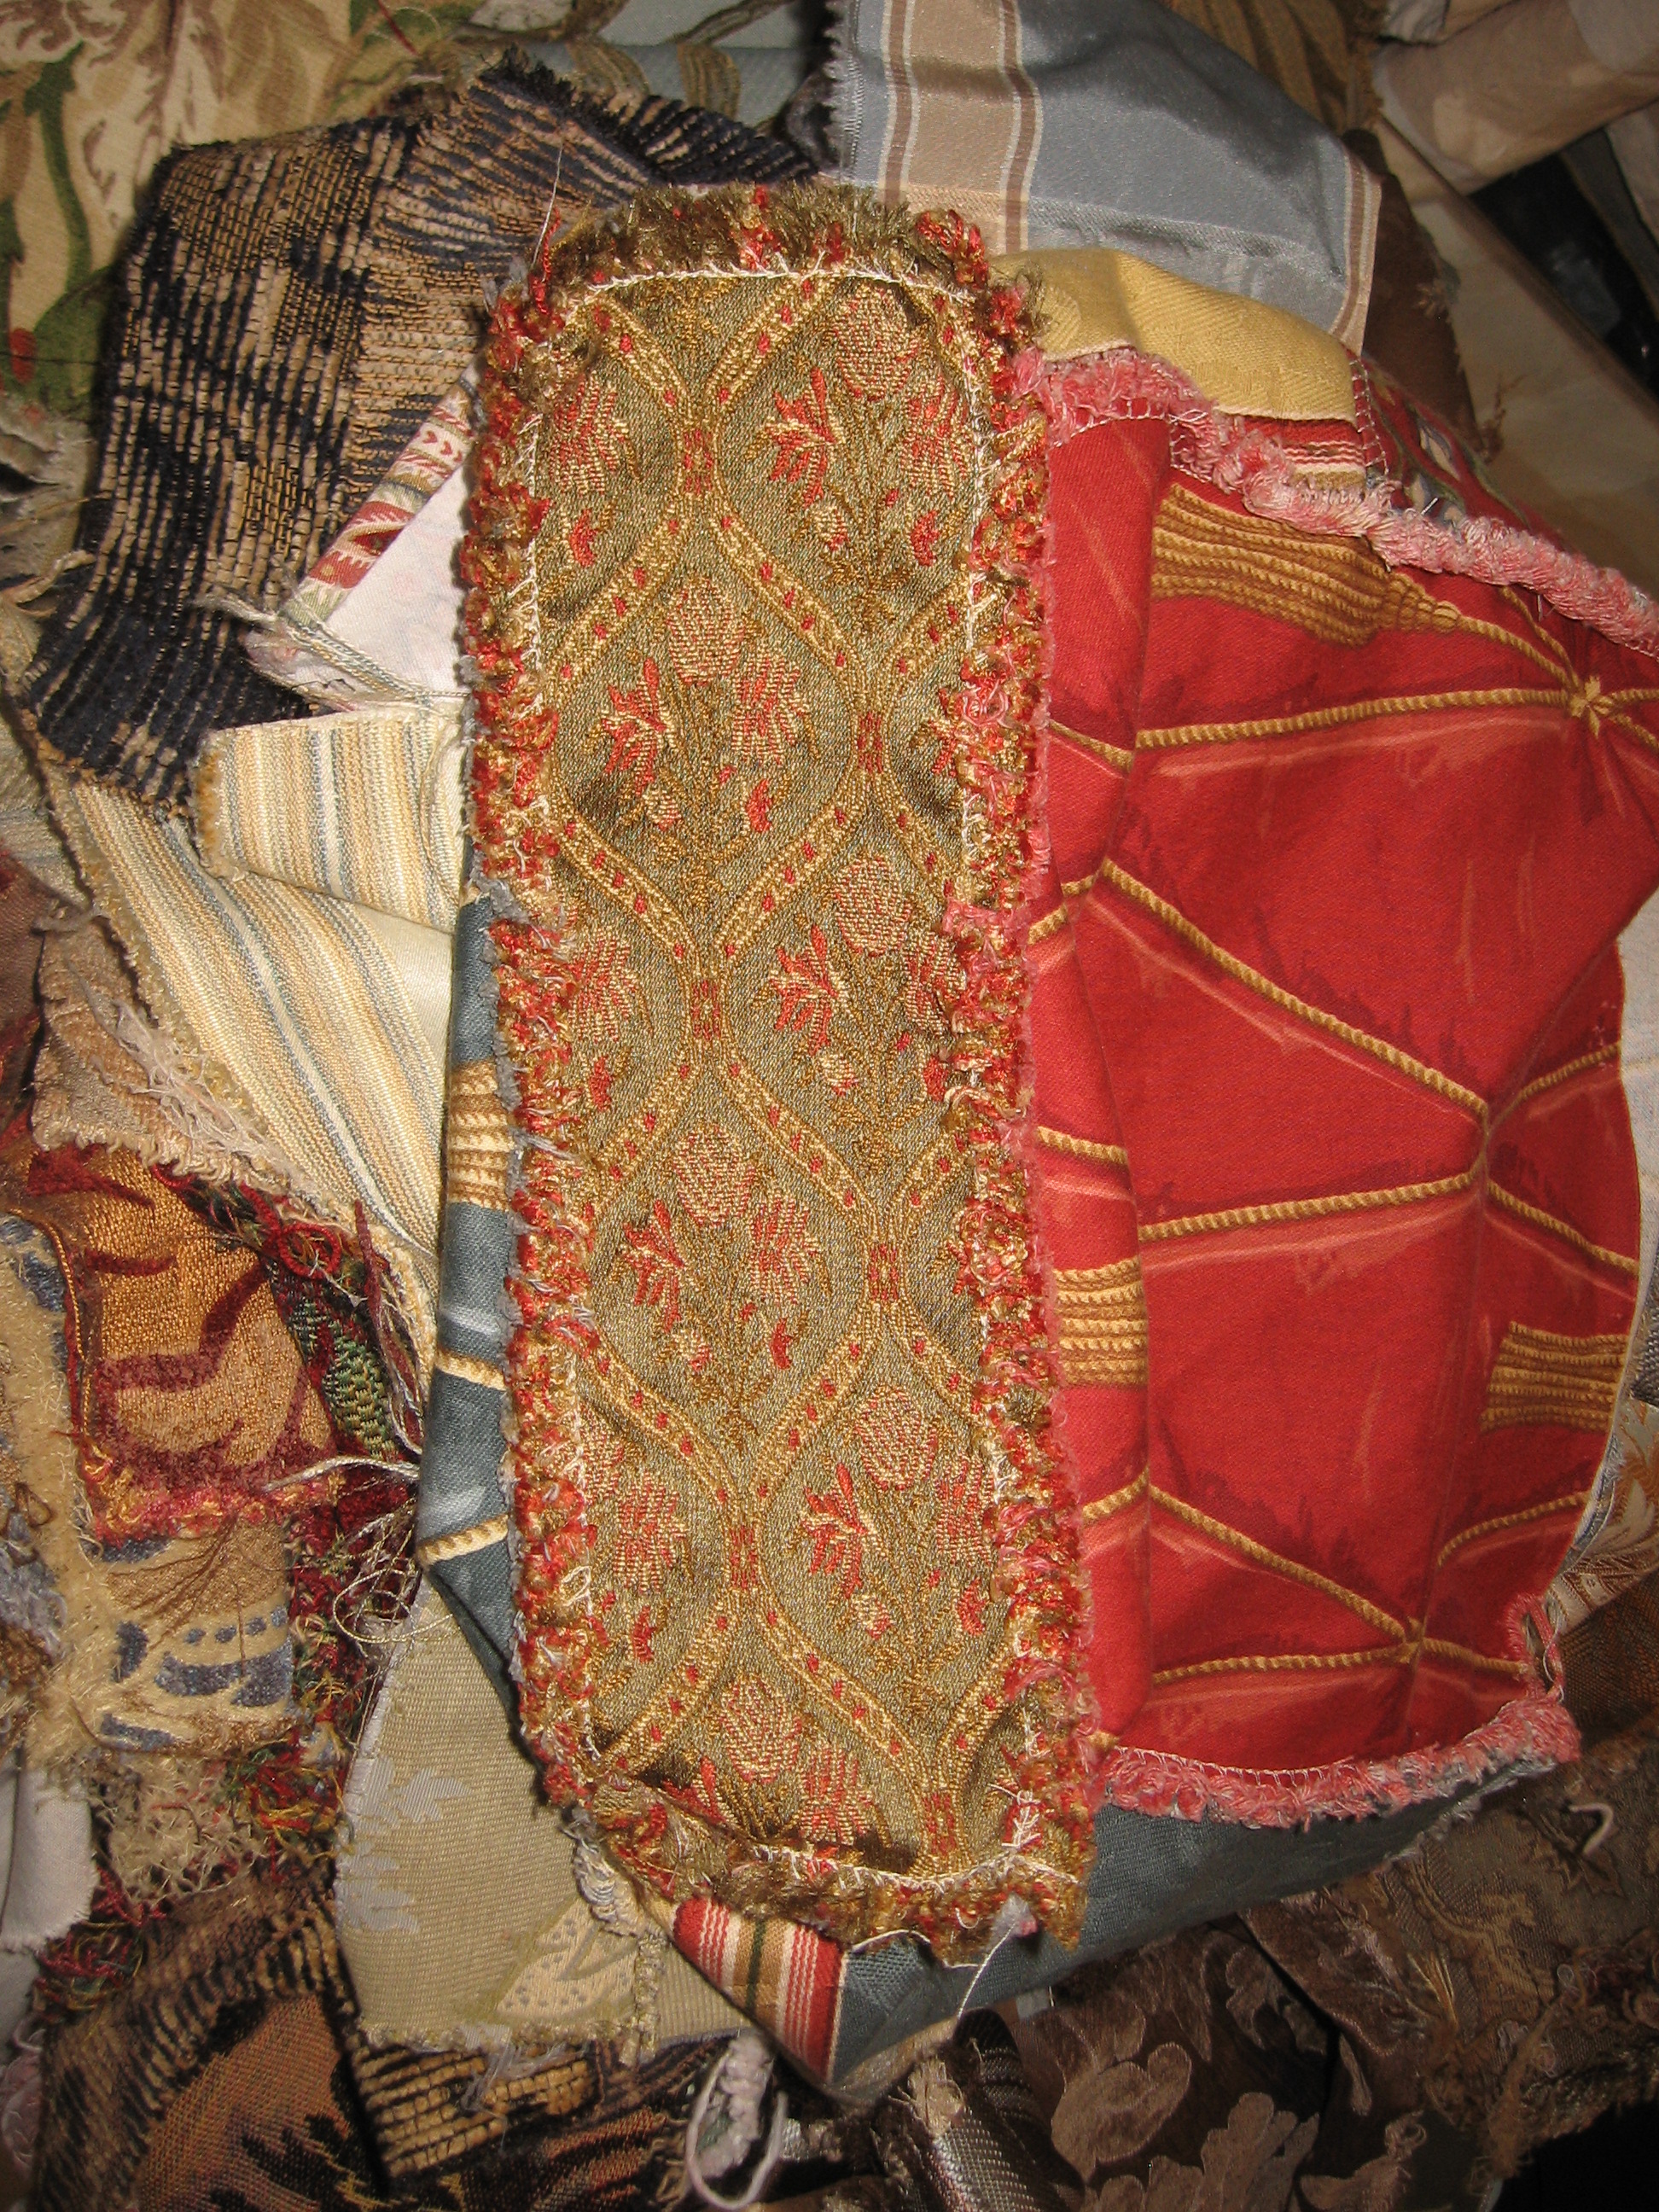
I pulled out a collection of trims to think about covering the raw edges where pieces were joined. Some of the trims in #ResourceCentral date back as far as 1969. The cellophane cover was of better quality then too. More recent ones just crumble off. These were still very intact. I’m blown away by their guarantee; unheard of in today’s market.
So every time something is added, things need to be reaccessed. It doesn’t pleat as softly now with the trim applied and it feels like it still needs something. I added the string of silk roses because it popped up while rummaging and seemed to be a thing I wanted on this.
Not sure at this point which will be the front. Perhaps it won’t matter on this one.
I’m going to square off those pointed ends. I should have applied that piece before the side ones so was trying to finish it off neatly.
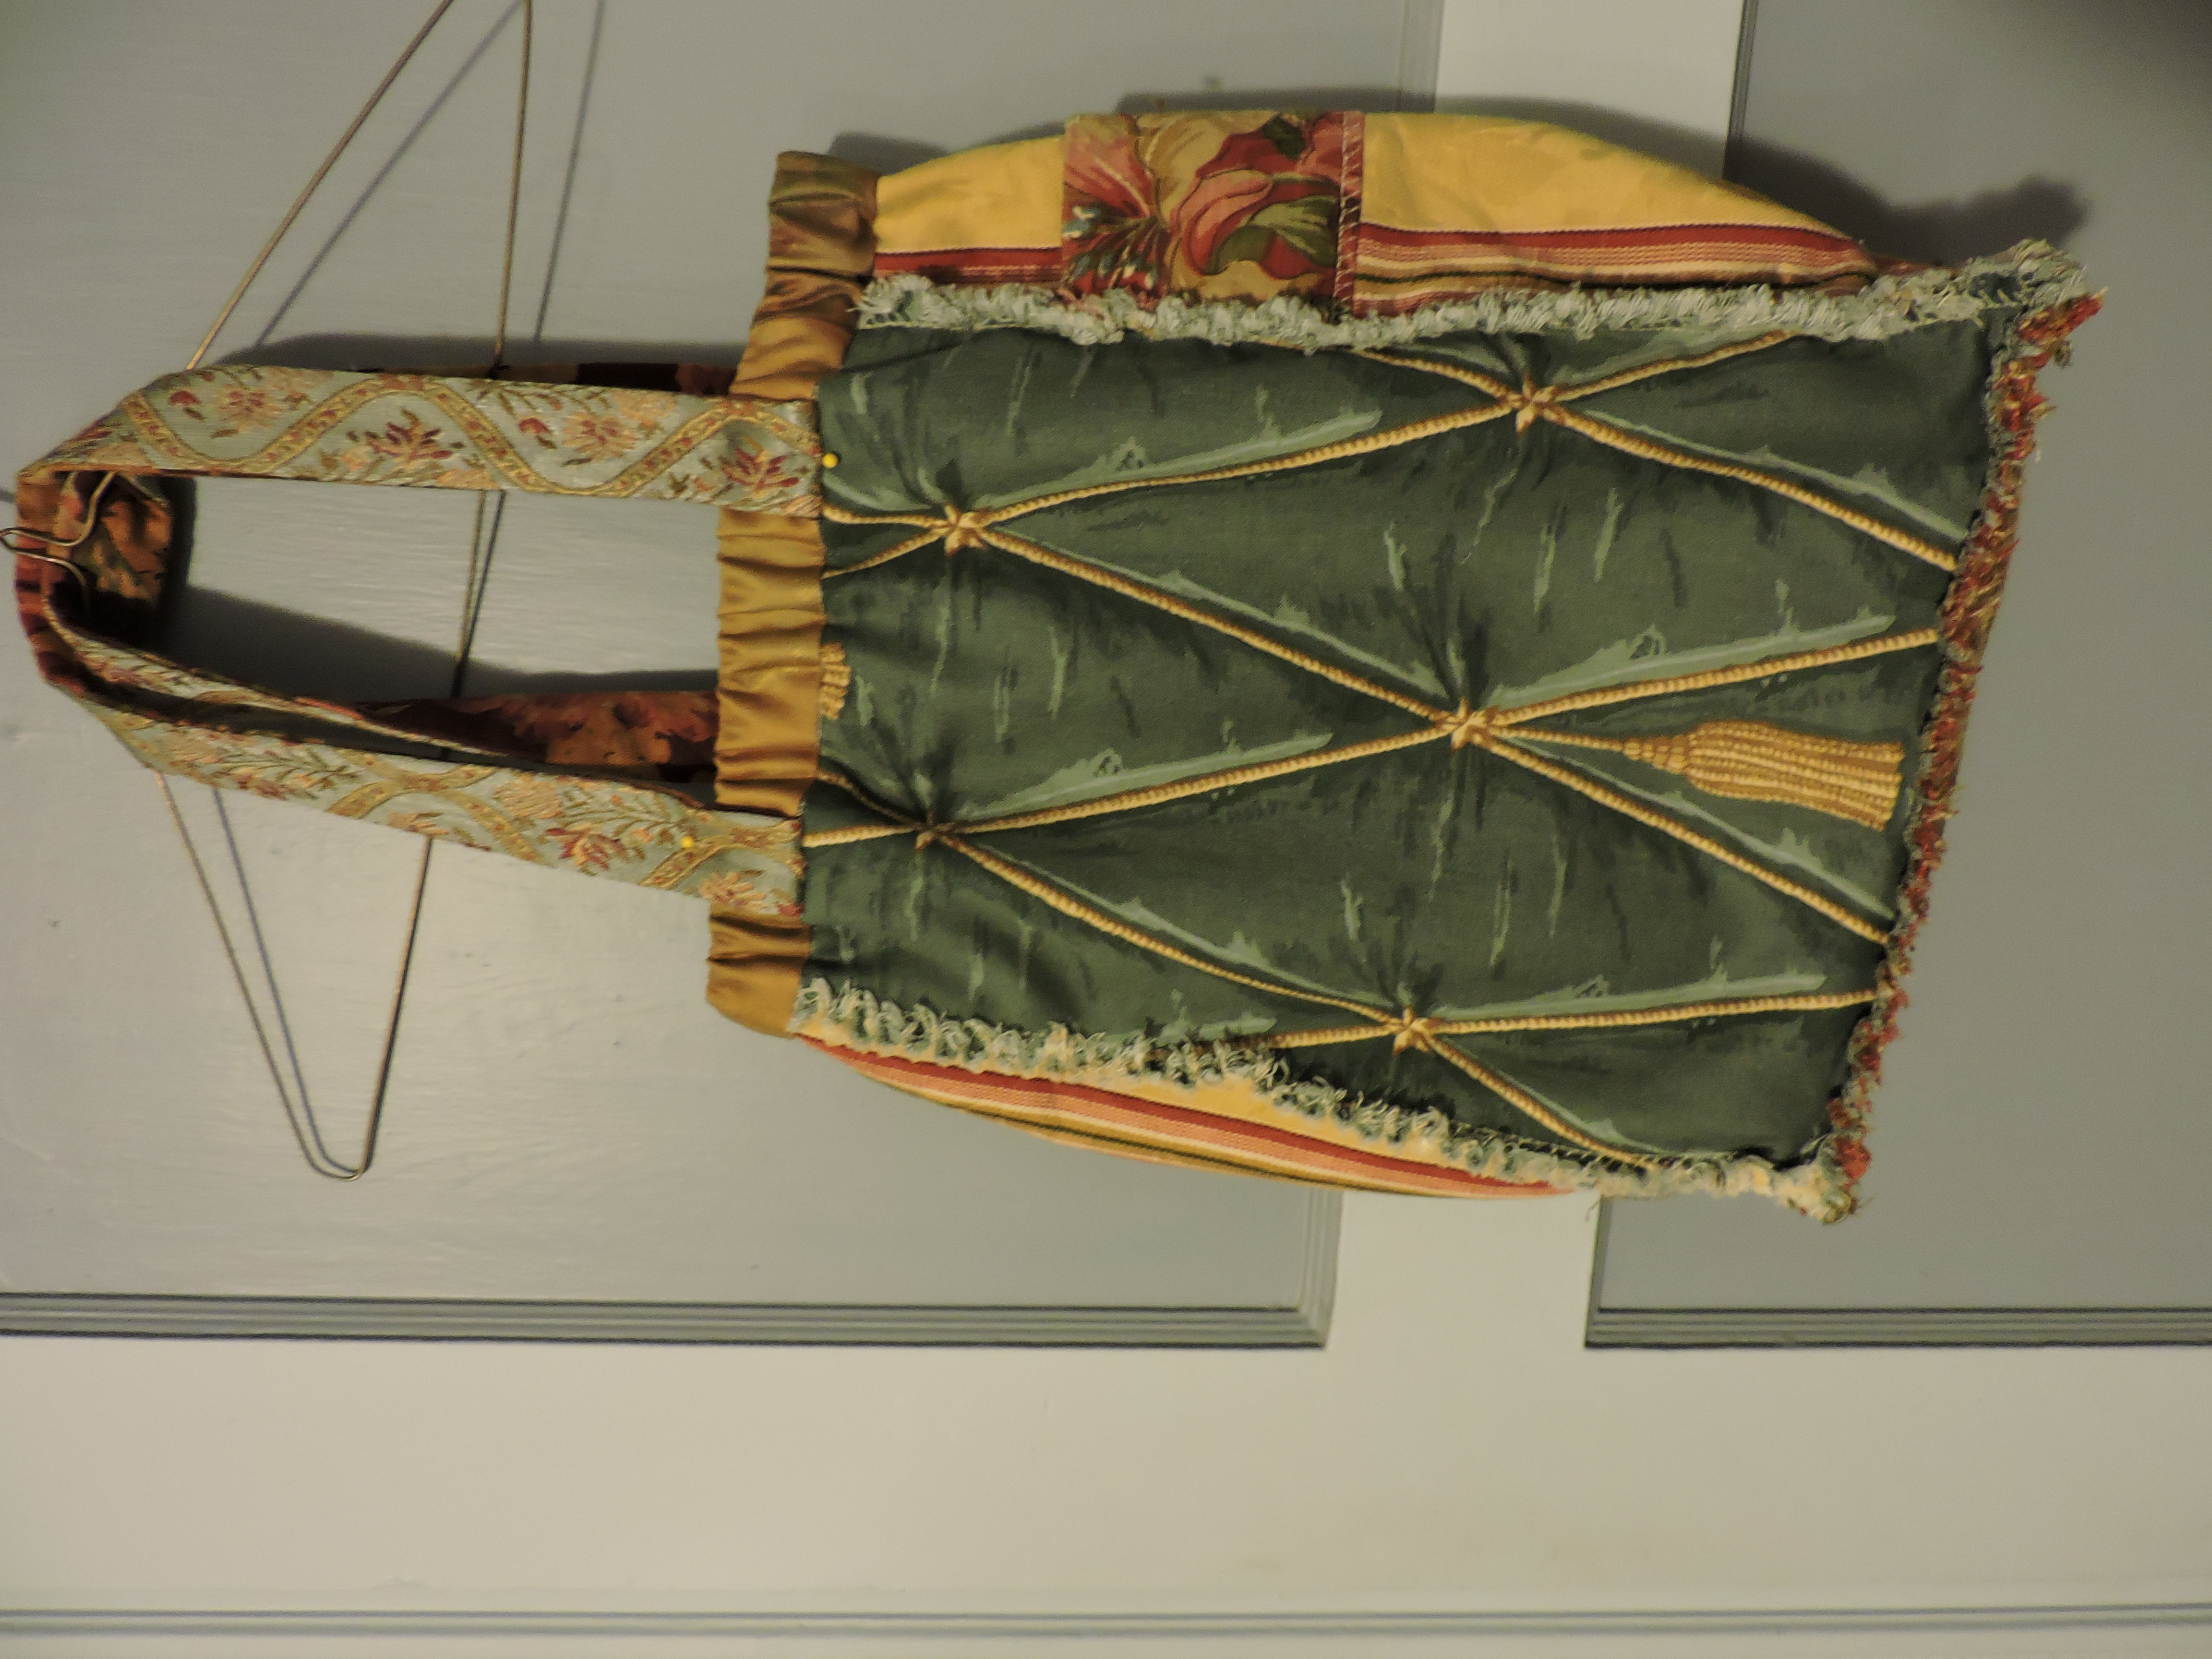
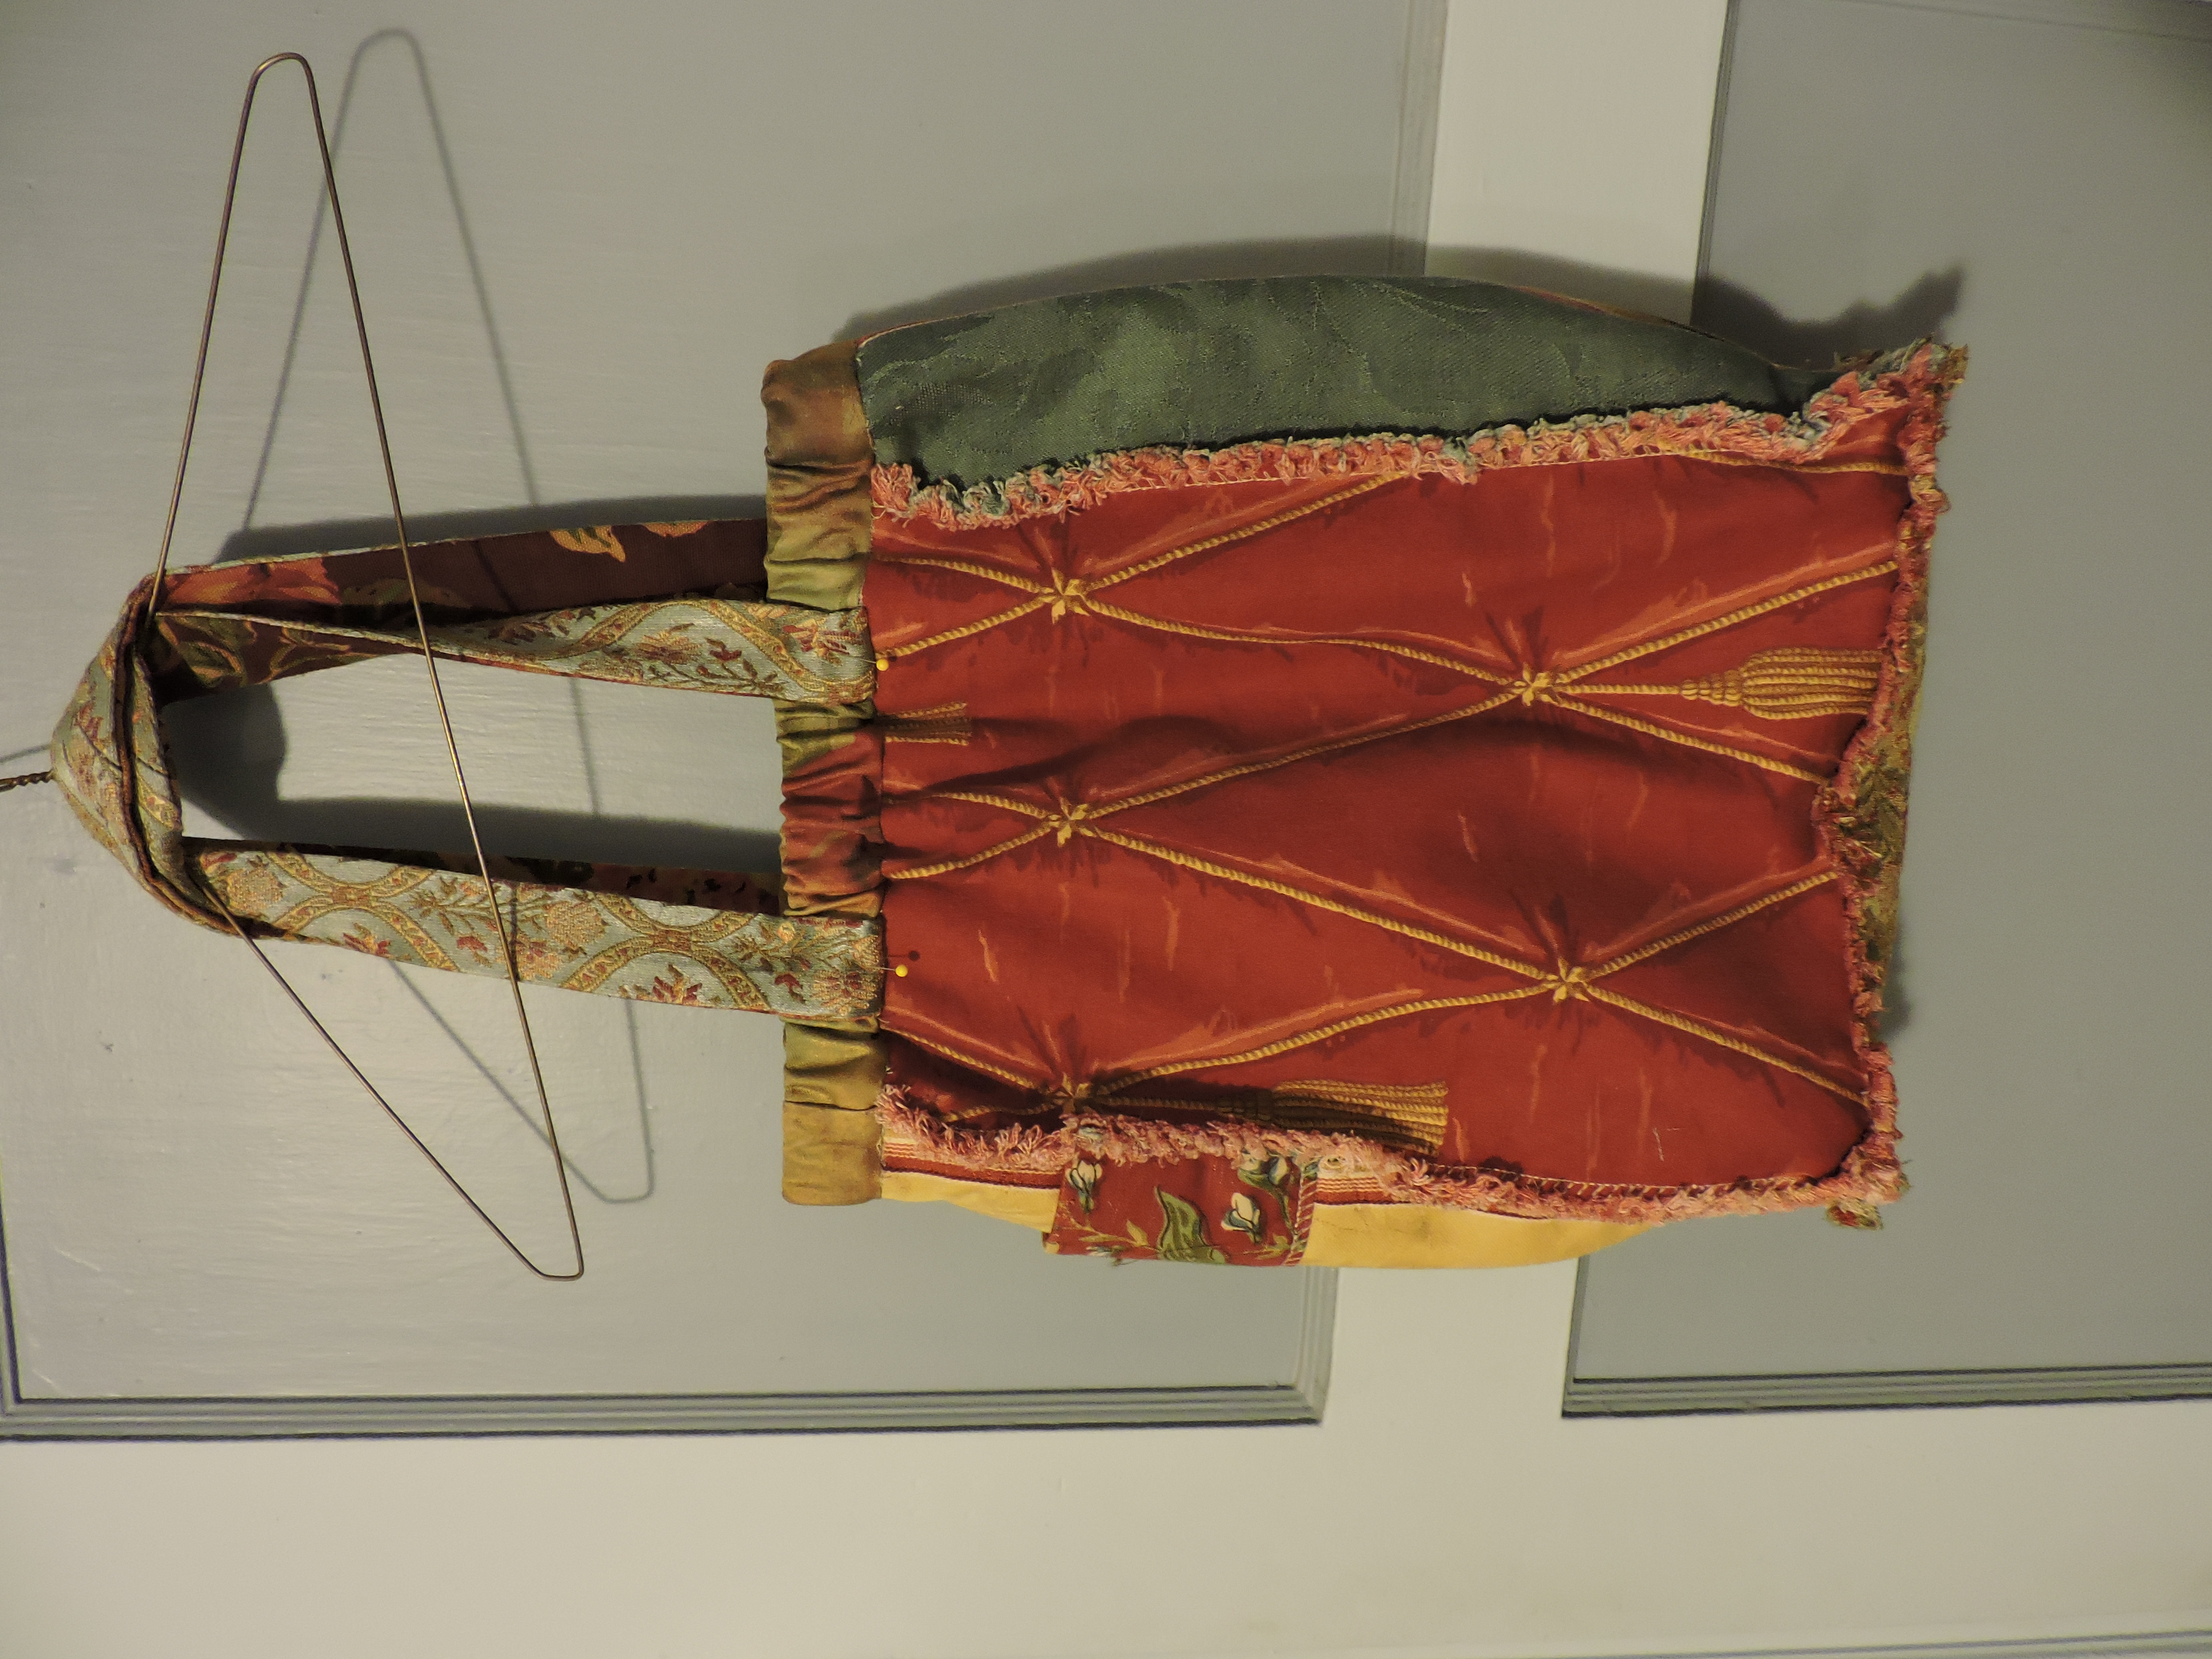
The piping was stitched on by machine, but all the lace was hand stitched with gold floss in a running stitch.
I’m rethinking the pleats. May do a soft gather or take the pleats out to the seams.
It was late when I added the purple and lighting was poor. I had seen it in the bright light and knew it was a risk; but intuition forced me to add it. We’ll see how it works itself in.
As with most things, I’m not sure if I like it at this point. So many times, clients would literally freak out at the time of installation of a decor redo. I would always tell them to sleep on it. Never had anyone remain freaked out. Change is hard. Most things just need a little tweaking to make them perfect or time to adjust. Wall colors were an especially big challenge. Especially men as most of them want white.
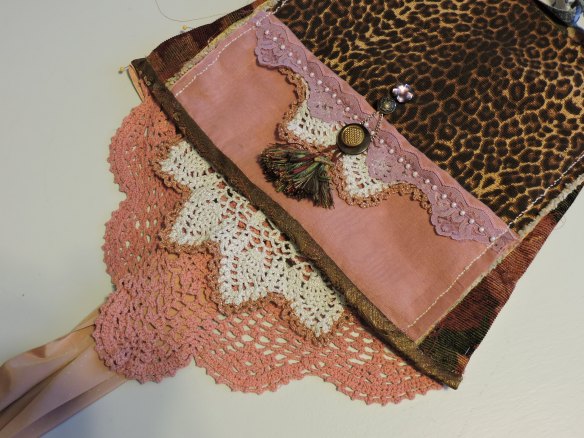
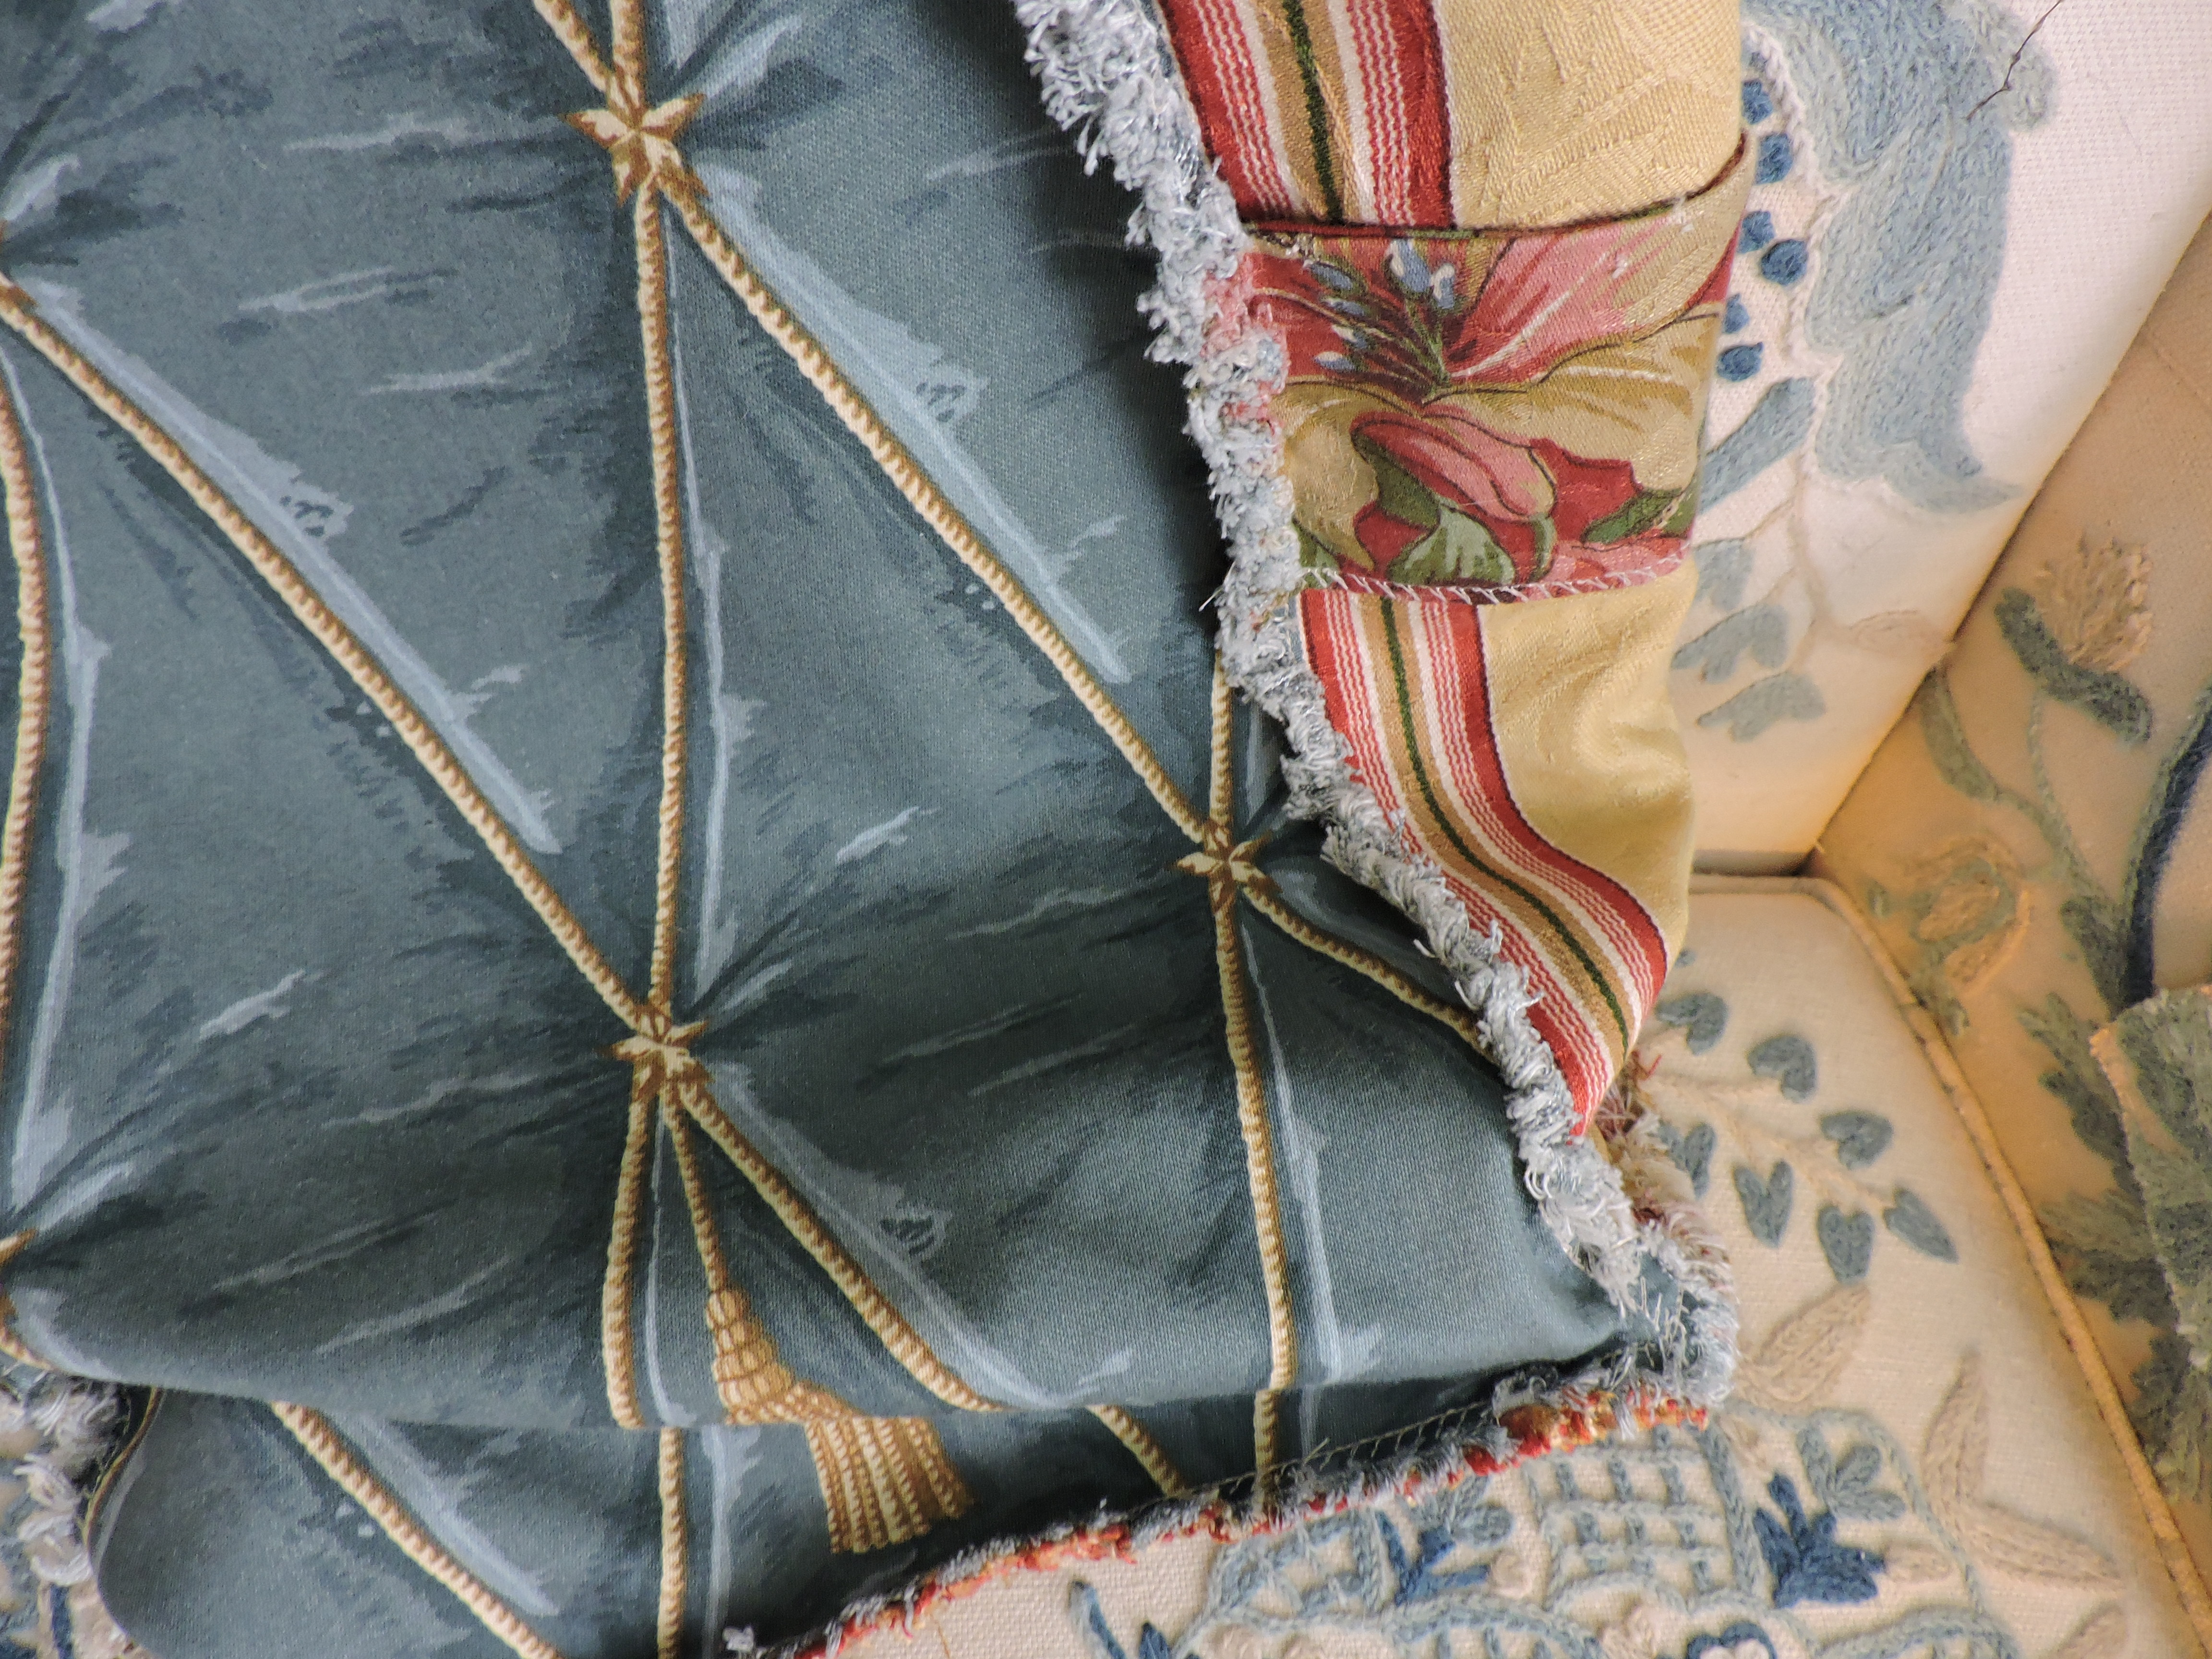
Some gold gimp was added around two of the patches. Adds to the texture and integration of colors; I think. Also added a piece of purple so that it shows up on both sides.
I’m really liking the pleats out on the sides and the whole thing is growing on me.
Found another color of lace trim…??
Wasn’t liking the pointed ends on the bottom but didn’t want to square them off. After adding the lining, I will simply tuck the seam in like a pleat and stitch along the seam to anchor it to the bottom.
Pictures are posted so that I can remember the process should I want to repeat it or teach it to someone; so, forgive if redundant or seem unnecessary. There are details that I want to remember.
This allows for it to remain able to puff out but gets rid of the points at the bottom
The pleats at the top are more complex
The lining will be made the same dimensions and attached so that a portion of the top is able to flop open. This is a deep bag and this will make access easier and the opening bigger. I imagine some kind of a dowel along the top edge with the straps running through the fabrics, under the dowel and back up long enough to go over the shoulder.
I fixed one corner of the gray trim to have the same miter slant as the other so now it looks more like a frame and am adding a row of purple embroidery stitching at the bottom of the lace to help it differentiate from the fabrics under it.
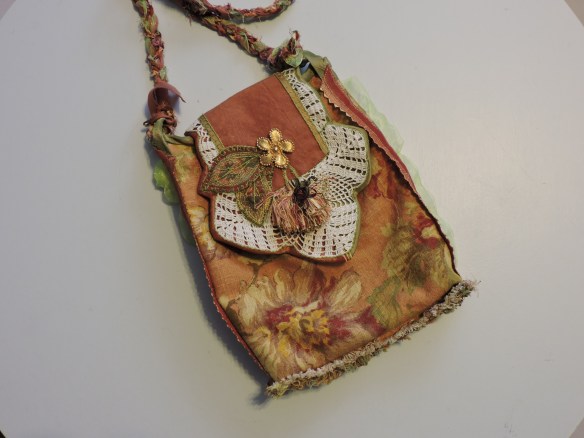
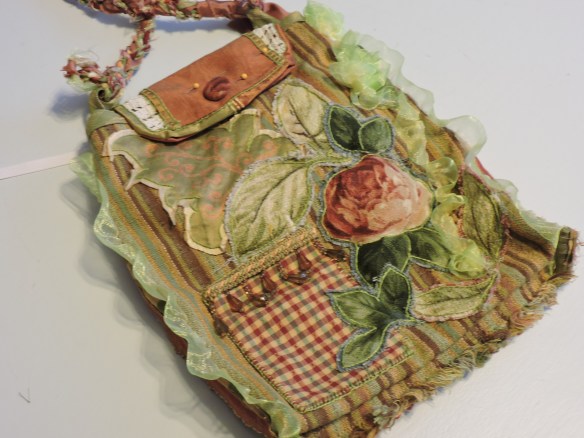
This piece was added in to the collection that constituted the inspiration box as when I put all the pieces together, I managed to space them wrong and needed to add something. Turns out to be one of my favorite pieces and I love where it ended up. It shows up on both sides so gives the bag continuity.
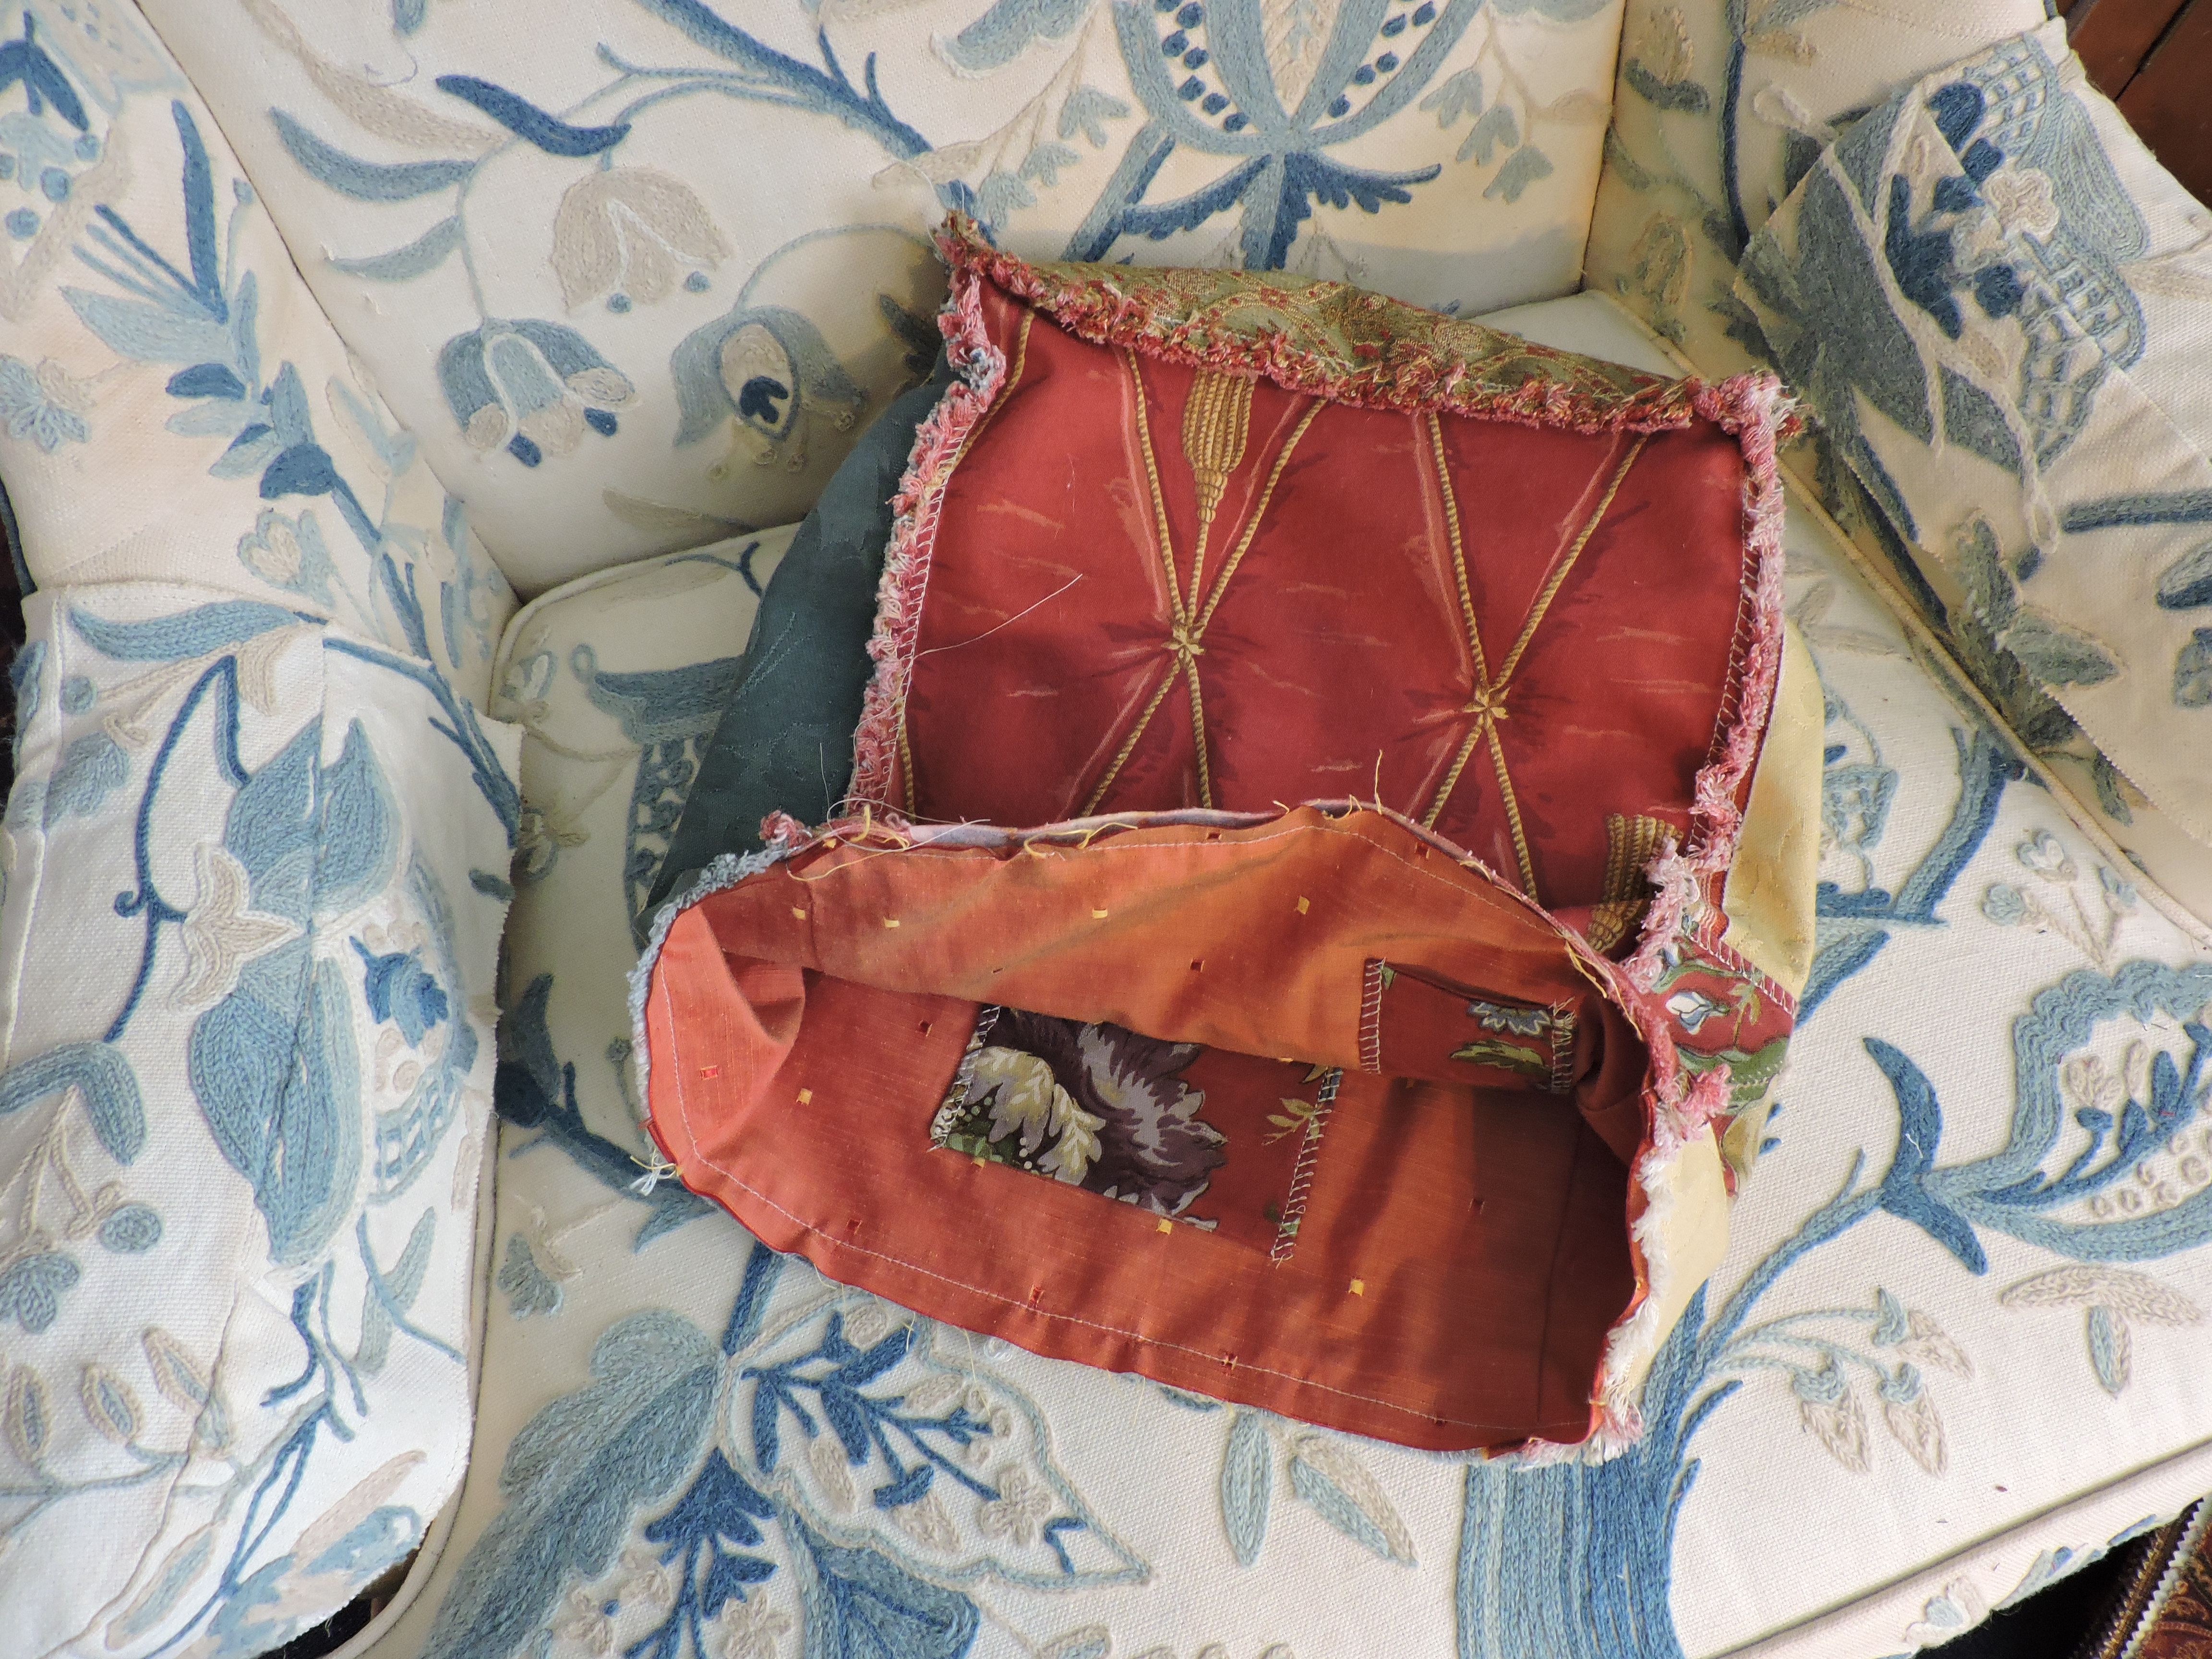
The front mostly complete. A few little details to add.
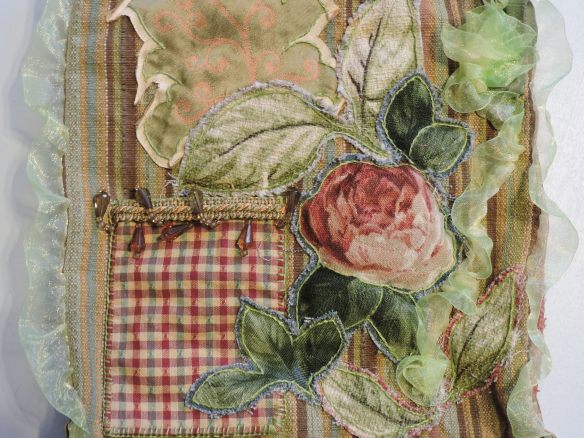
This is the back of the purse face fabrics.
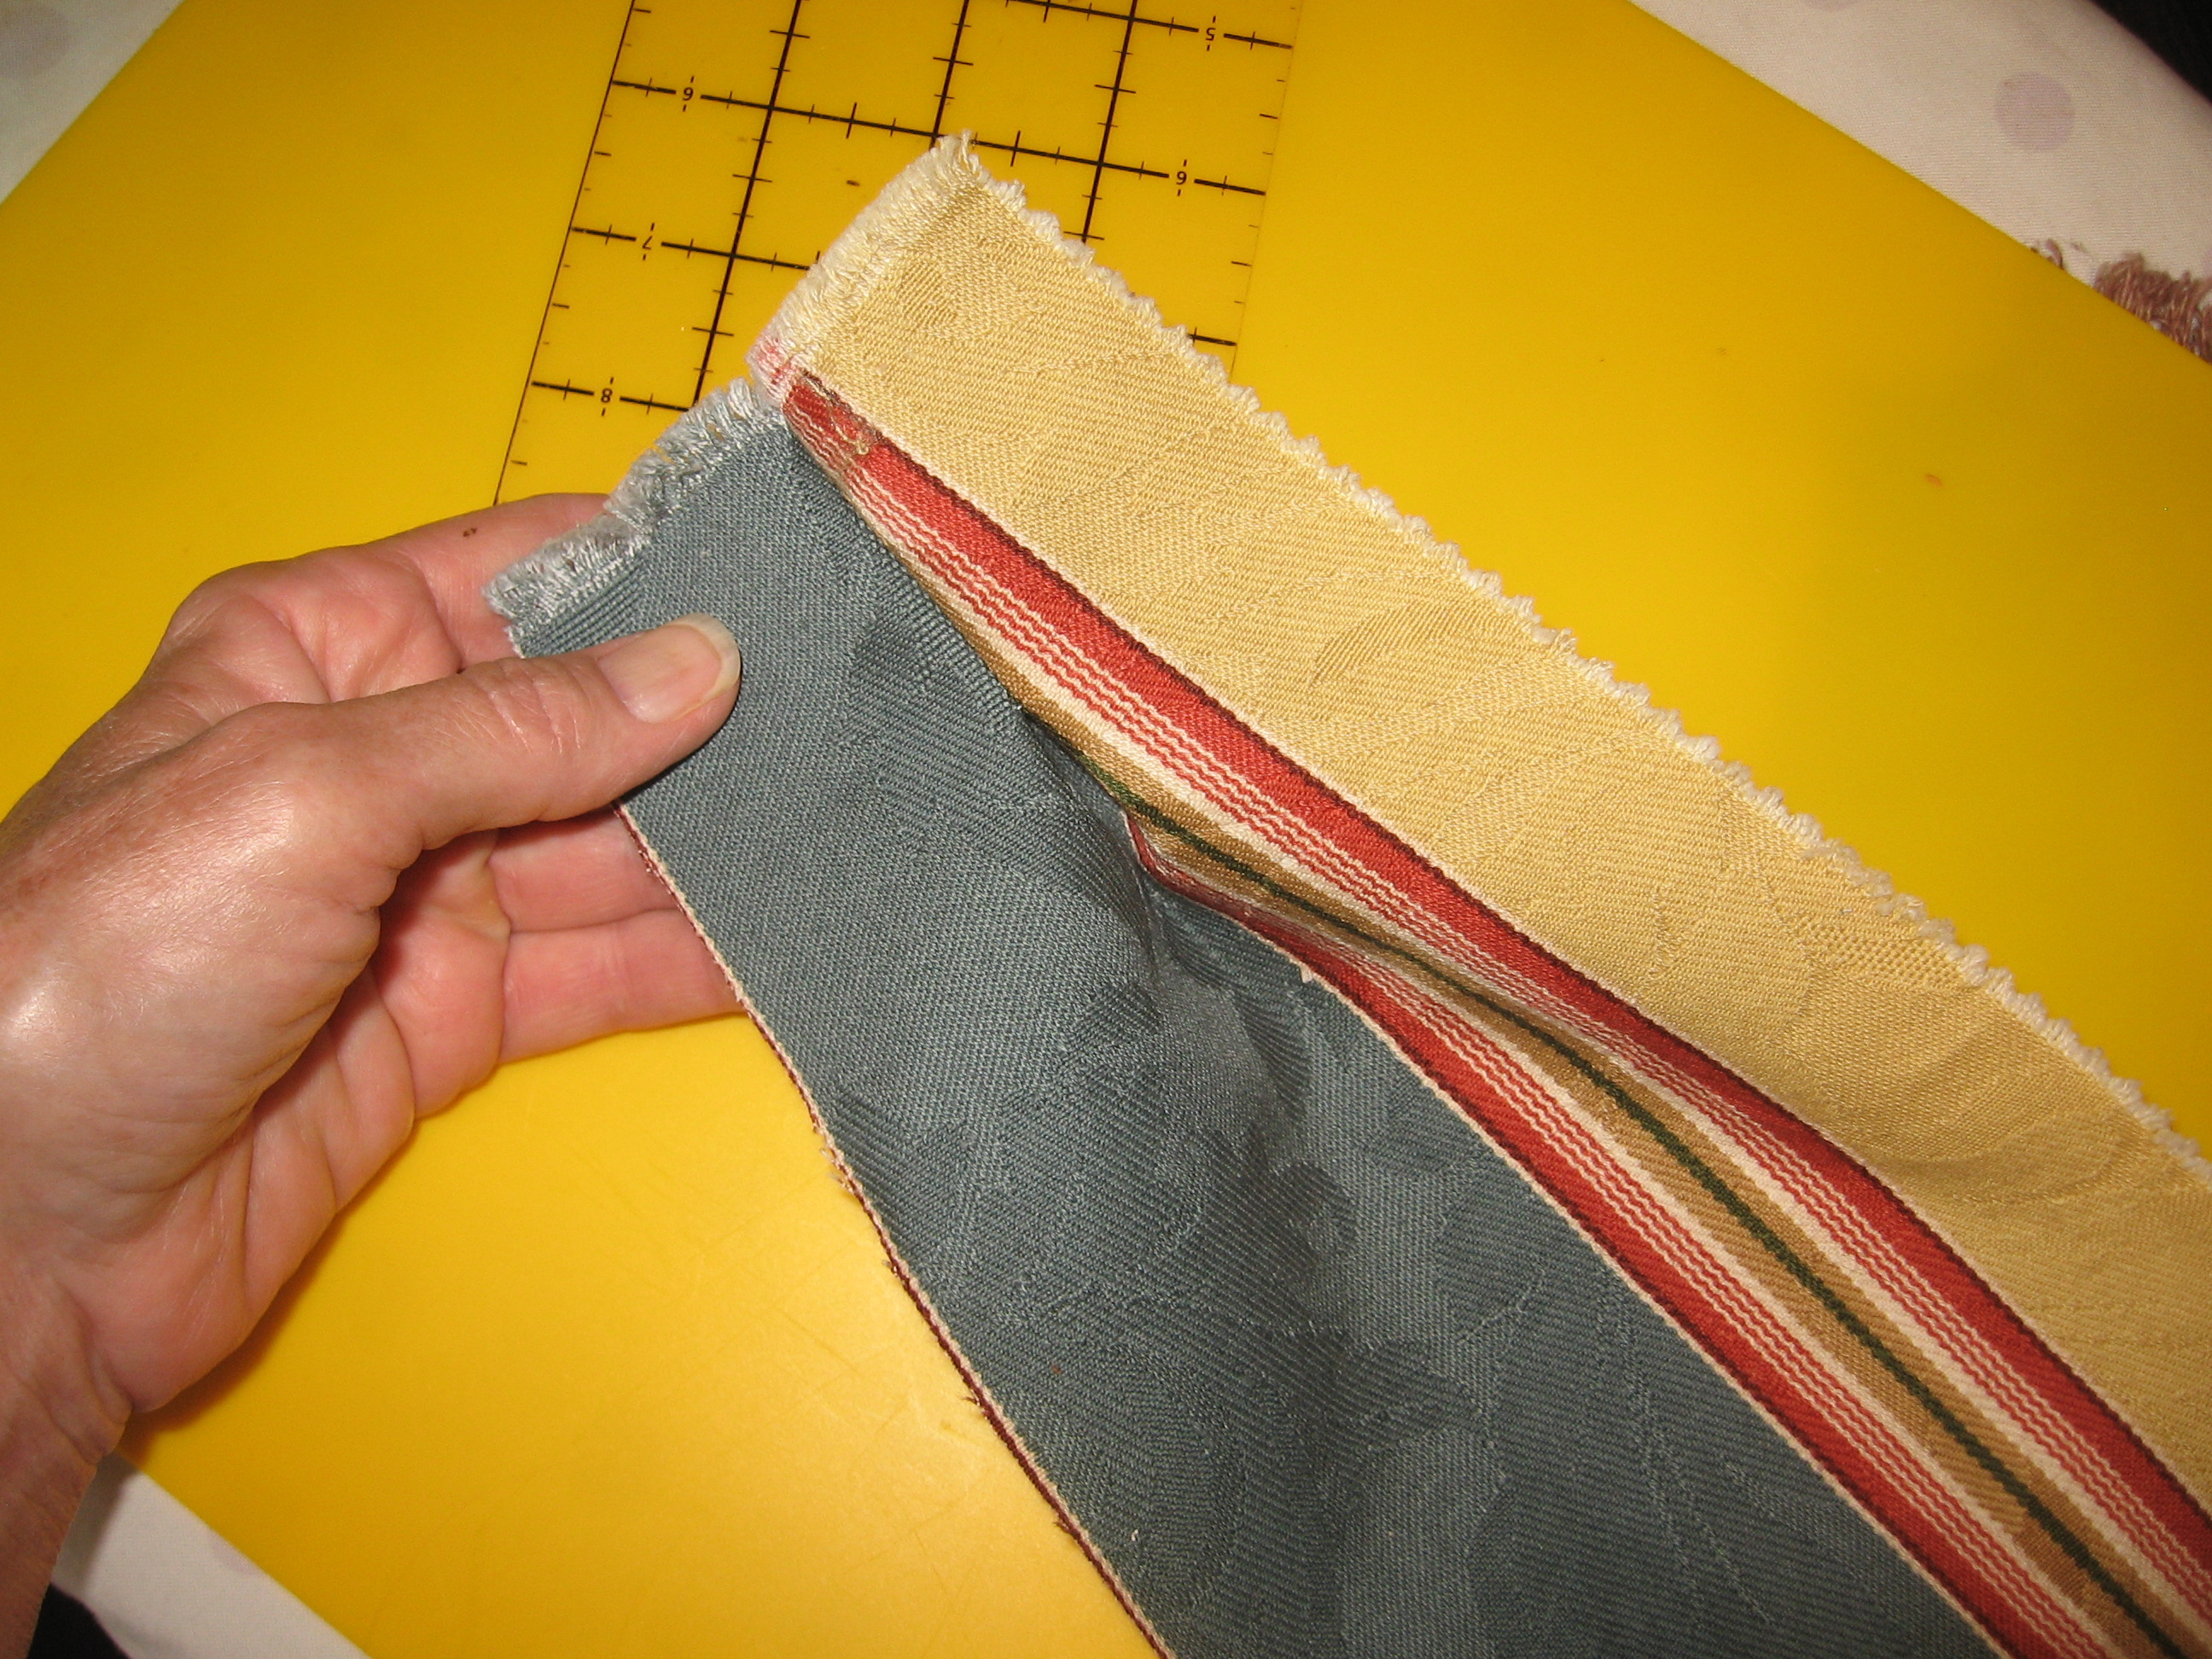
So now for the lining. These were lengths cut off of a pair of mens dress pants. As you can see, the pieces didn’t cover the width of the purse face fabrics and were way longer than needed. That was cut off and used to splice pieces to compensate for the width issue. It just barely made it; almost too perfect. Phew!
The two ends were stitched together and the edge finished with a stretch stitch.
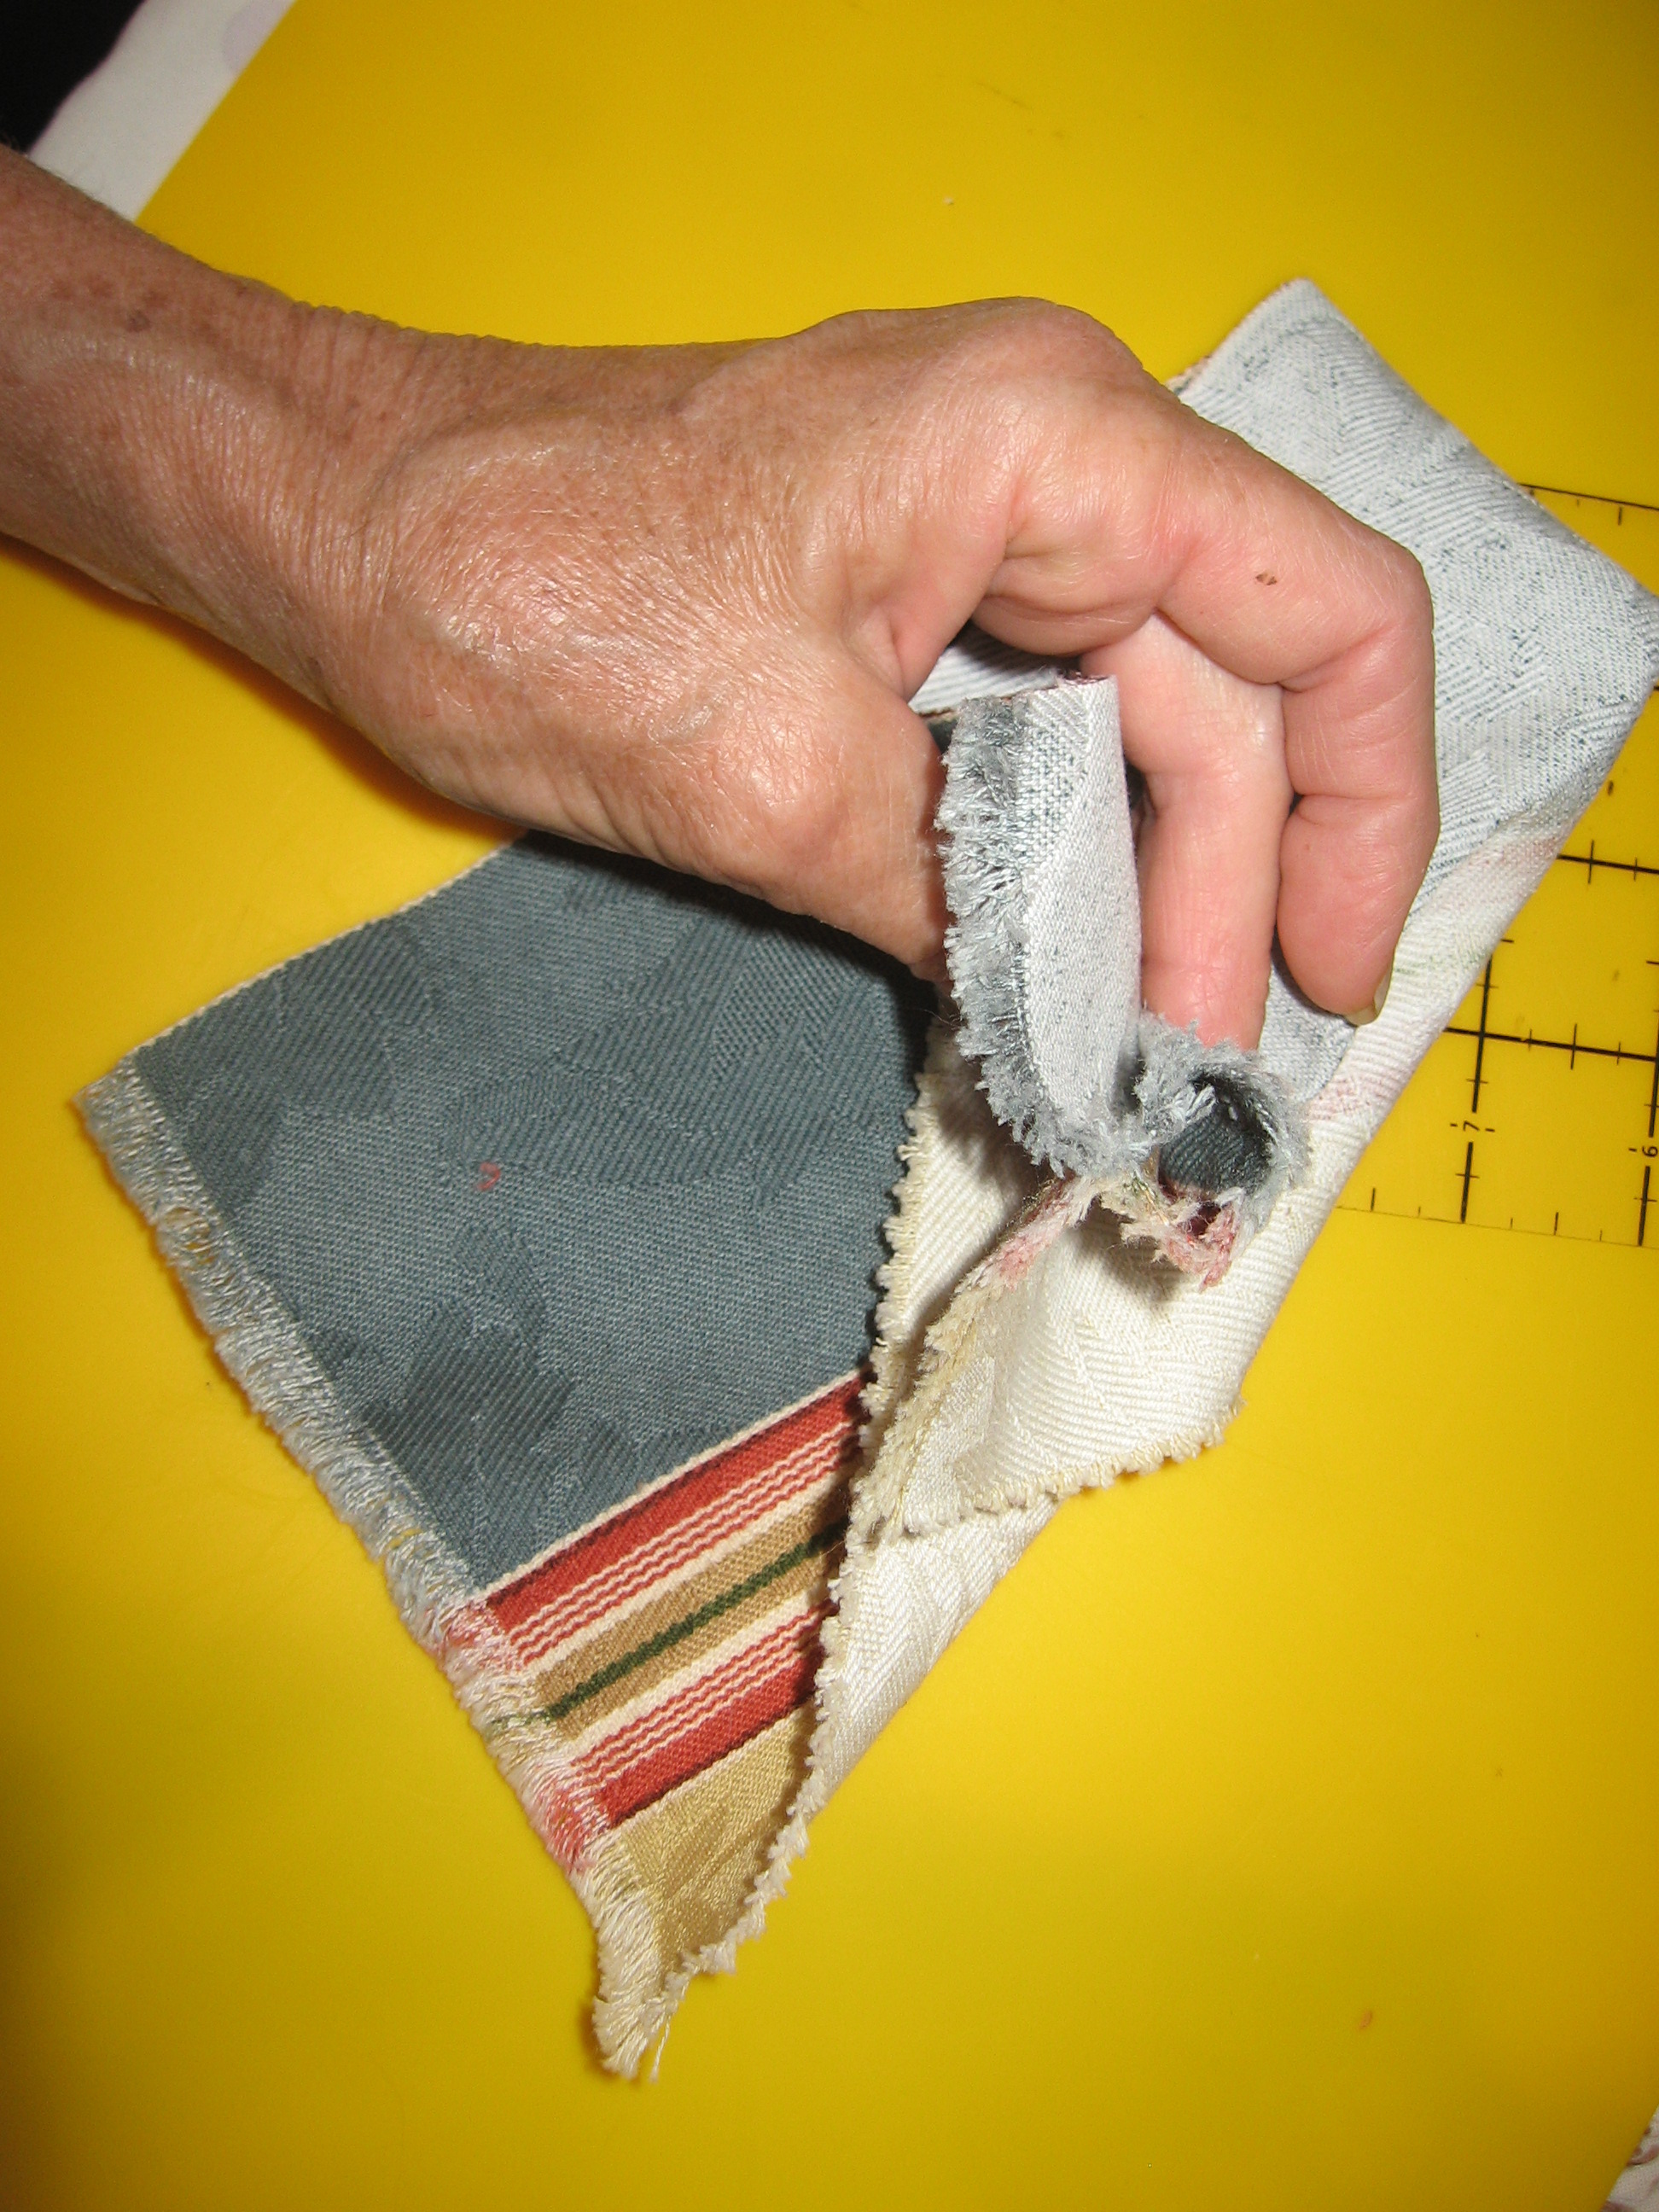
After evening off the two pieces that were cut off from the length, it was just exactly a fit. Now I’m trying to add a pocket before attaching the lining and also trying to figure out how I want to make the opening. I’ve got an idea for dowels but still trying to work it out.
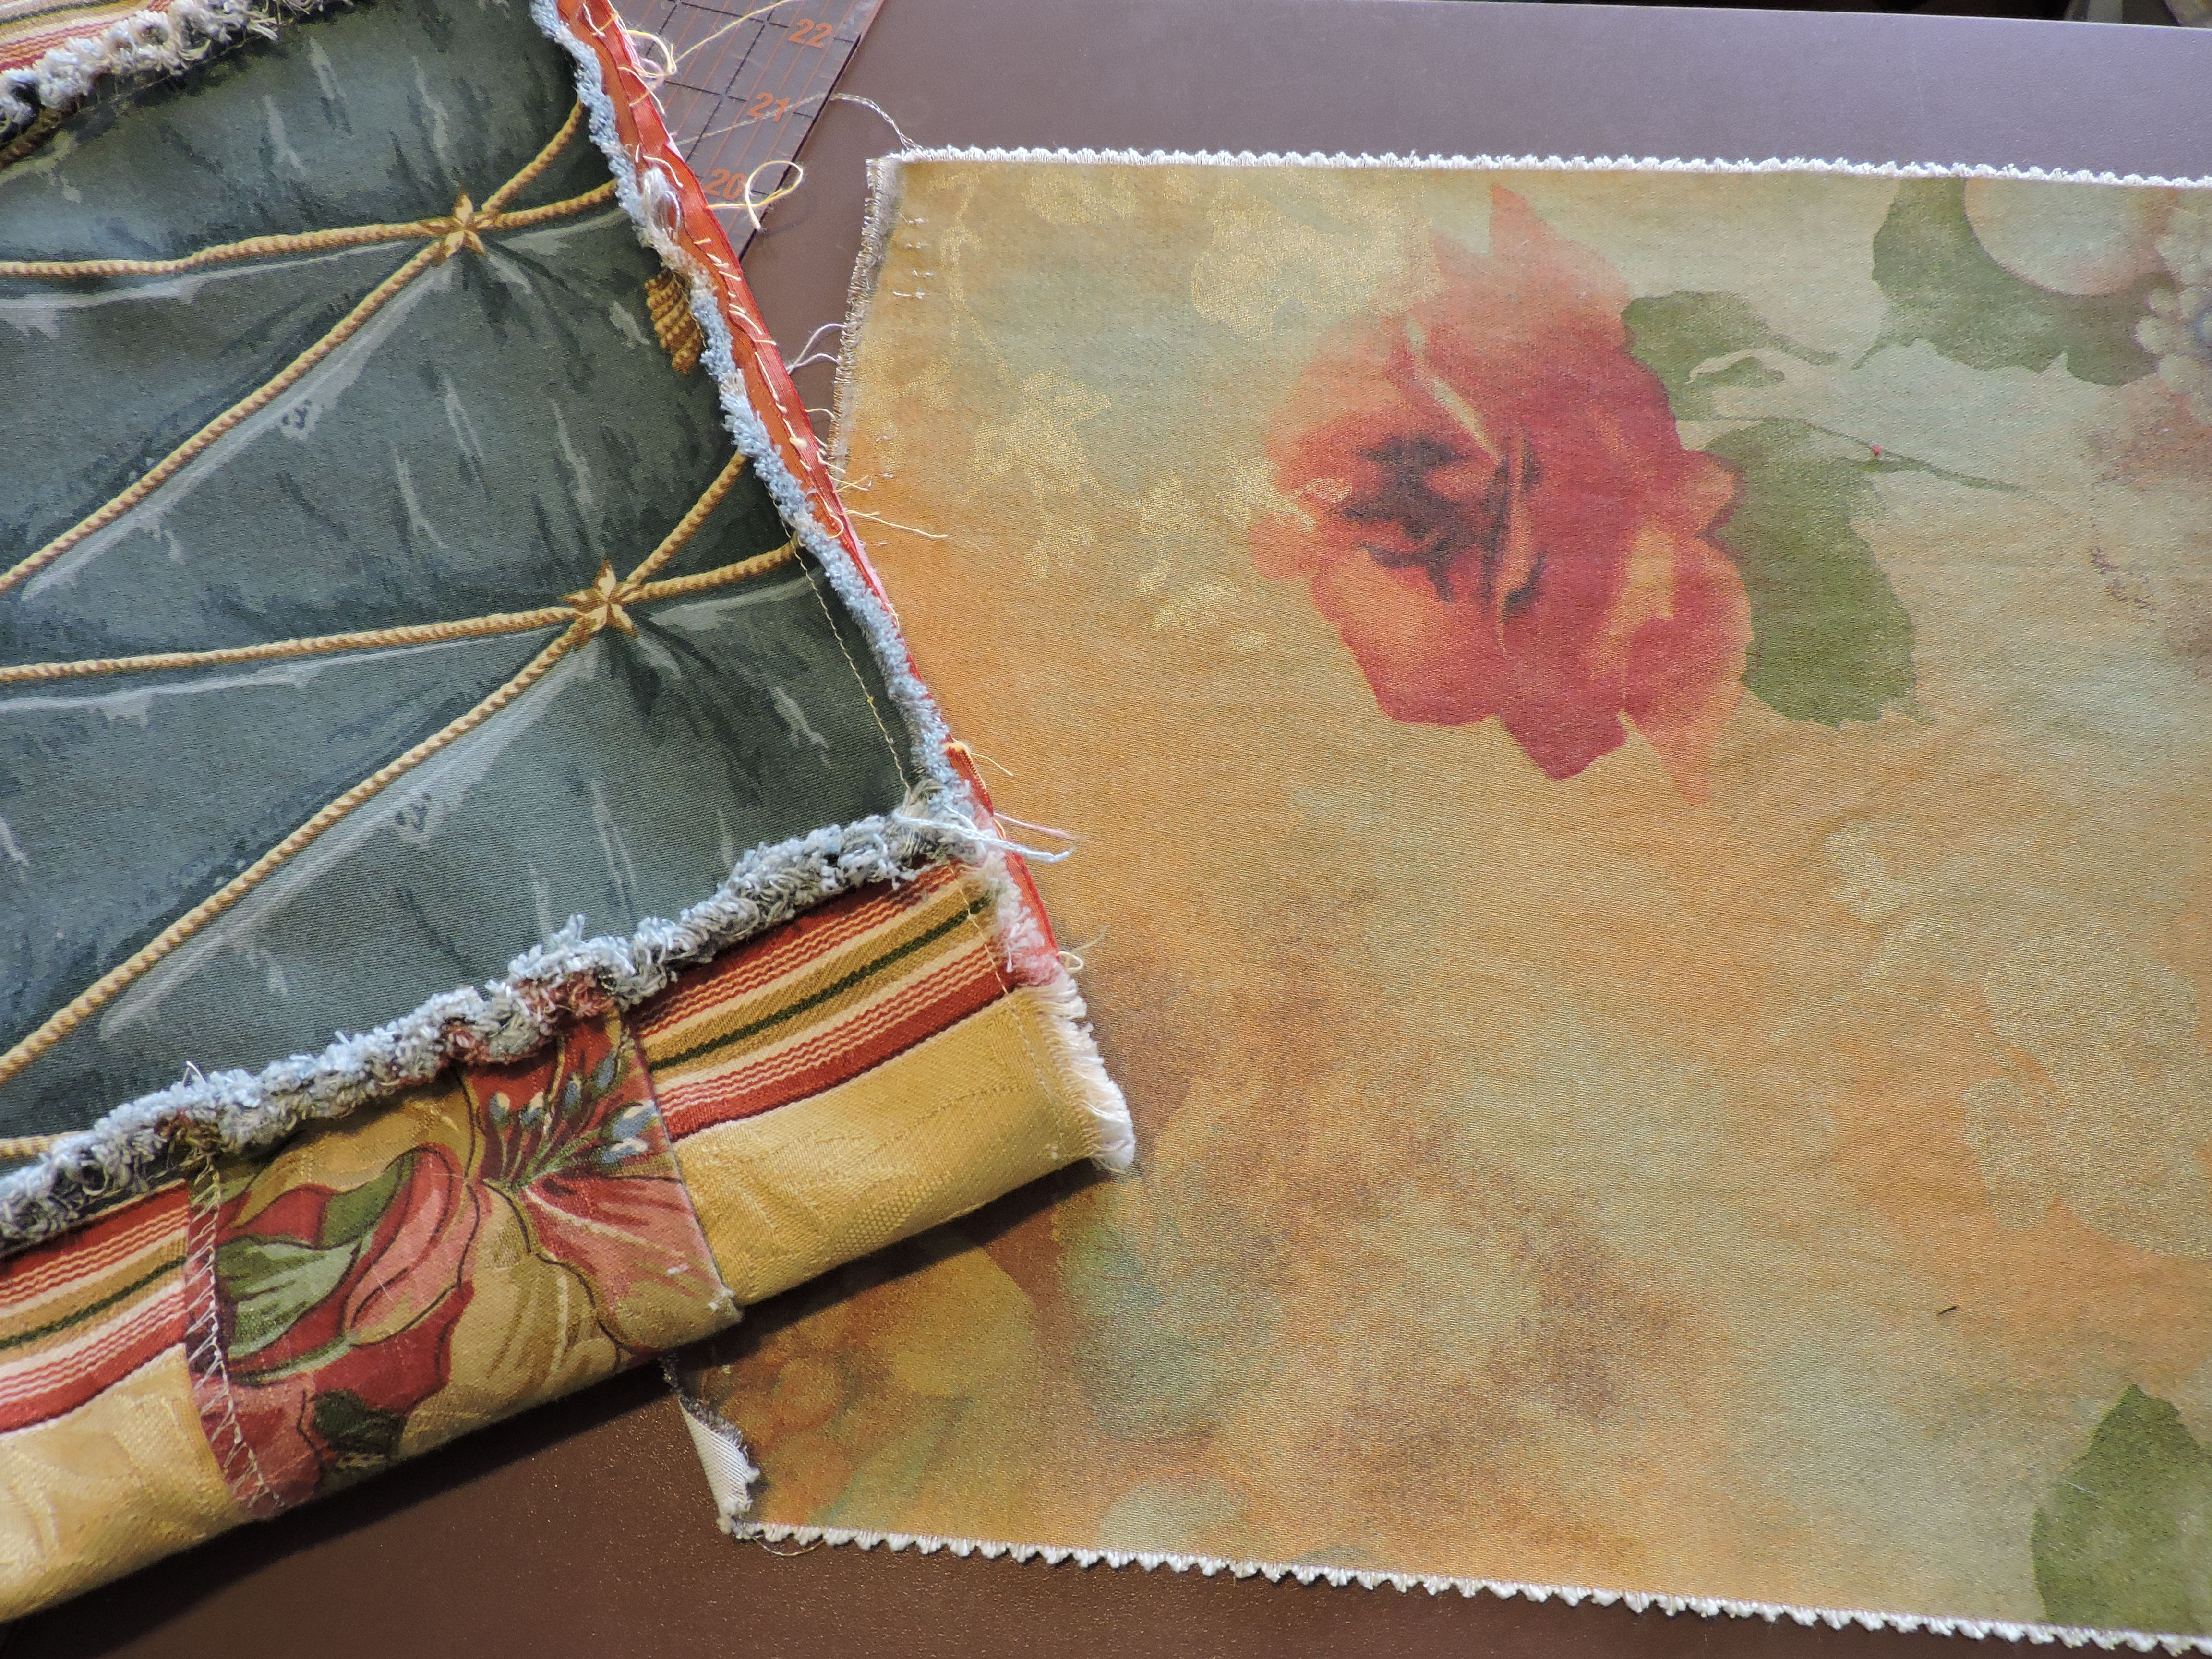
This striped fabric was a pillow cover I got for a song at a dollar store and cut up to use otherwise. I have PLENTY of pillows.
Another piece cut of of a pair of mens pants.
It isn’t quite deep enough so I will either cut off to match the lining or just roll the edge over to the lining side?? I got in a hurry to see how it looked and didn’t press the pants fabric. Will do.
one of the first images that came up for the search term “Carpetbaggish”
Mary Poppins bag

To view this story in pictures instead, click this link. This post is a compilation of the descriptions on the images.

Mary Poppins bag

Advertisement

Sewing Bucket List

She’s been a little busy.

Since ‘retiring’ a year or so ago, she hasn’t been taking client work. That means she doesn’t have to quit in the middle of creative juices flowing and then try to get back to it later; she can just keep with a project uninterrupted.

She’s finally gotten to her sewing bucket list. The first one on her mind was a patchwork quilt. As a child, her mother started her three girls doing them for rainy day projects. It has been a thing she has wanted to revisit ever since.

The bucket list seems to increase rather than diminish. This ‘toothbrush rug‘ one of the increases.

A yo yo quilt has long been on the list. She seems to cater to the 40’s style of things. Doesn’t it seem that each generation seems to like what was popular in the era of their mother’s youth?

This T-shirt yarn, Tarn, scrappy rug didn’t turn out well. She couldn’t keep it from ruffling no matter how she tried to do the increases. It’s in a drawer awaiting another life.

A long time on the sewing bucket list was to make a Canadian Smocked pillow. She mastered the smocking but failed to sew the seam before doing the smocking, so the two ends couldn’t be matched. Somehow she failed to do a row that would have made it right. She may turn it into a square pillow. It was supposed to be a bolster.

The thing about researching”how-to’s” is that you run into other fun stuff along the way. This scrappy rug was inspired by a lady on Etsy that makes hats and she was trying to find a tutorial for her technique. She ended up working it out on her own. It’s not easy crocheting with knots, she learned.

DSCN5377

Once in awhile she gets housework done or a project that makes sewing easier. She finally turned these lollipop display stands into thread and bobbin holders.

If you remember, her career was mostly working with clients, in their homes, helping them design their furnishing and window coverings. She had a little stint of trying it on her own and accumulated scores of fabric sample books to help her do that work. While she still had an electric washing machine (she now does all her washing by hand), she tore apart a big bunch of them, washed them and arranged many of them into ensembles she imagined could become something wonderful together. Many, many more books she simply gave away. Well, she is finally taking one box after another to work these imaginings out.

DSCN5756

Art to wear.

She never knows where it will end up when she starts out. She lets the fabrics tell her what to do. Above image is the front. Below image is the back. It went through many gyrations getting to this point. Still more to complete.

DSCN5840

Trapunto detail on the rose.

DSCN5802

The plaid pocket accommodates a small flip phone.

The “Tiny Purse” is the latest project, started with the intention of making a credit card holder for a friend’s upcoming birthday. She got carried away when the fabric told her to do otherwise.

She spent a great deal of the Summer trying desperately still to get her food to grow in the southeastern desert of Arizona. It’s a big challenge, but she did make progress and learned lots of new things.

Now that the cooler, shorter days are here, she will be working inside, spooling around a lot more.

She hopes this post makes up for her long absence from the blog, that you are well and headed toward an enjoyable Winter season.

Product Development Deployment

Boho drapery sample patch purse

The idea of developing a product is to come up with something that can be sold…at a profit.

For the most part, she enjoys the whole process; but two days and probably sixteen hours into it, she wonders why she puts herself through this grueling process. 16 hours times $10 an hour (her minimum mentally acceptable labor rate) is $160. Debra Dorgan wouldn’t hesitate to ask this much, but Ms. SpoolTeacher is not of that caliber, at least not yet. As a matter of fact, it was viewing Debra’s lovely things on Etsy that had gotten Ms. SpoolTeacher’s muse all jazzed up to sew. That and the weather. And that most of her winter seeds had been sown. Oh sure, there were lots of projects available to do on the First Do No Harm Front Yard Farmacy agenda, but it was time to start thinking about earning more income.

During the summer monsoons, all of the sample books on the top shelf under her patio cover had gotten wet from leaks that occur along the joint where the cover meets the house. She had pulled them all apart and was washing and drying them to use for projects such as this one that got in her mind to do.

This day, two days ago, she was sorting samples that had finished drying suddenly two samples got her muse activated so she started work immediately.

Making a pleatThe front and back of the bag would be two colors of the same print and the sides would be a stripe piece cut in half.

She decided to make a pleat at the bottom edge to add interest and keep it from being a boring rectangle.

Her design plan was to utilize as much of the sample piece as possible. two inches up, one inch in

To make the pleat, she measured two inches up and one inch in and stitched the line. Then the pleat is pressed so that the middle meets the seam.

pleat detailThe next design decision was which side would go with the red and which with the blue. These things are more important than you would think. yellow, red, blue, yellow

Yellow, red, yellow, blue. That way the sides separate from the main body, visually.

She had sewn them together so that the bottom edges were all even so she measured all across the four pieces to make them even at the top as well, then seamed the final two edges together to form a rectangle.

The next decision was what to use for the bottom.

She laid the “rectangle” on a stack of clean samples and started flipping through them until one “felt” right.deciding on a bottom

The lining was made using all of the same measurements she’d just done making the shell.

She intentionally made all of the seams on the right side of the fabric because she wanted to use a ragged edge as a feature. As it turned out, she realized she’d rather have stitched the lining to the shell pieces before seaming them together as then the lining would have also shown in the ragged edge. This is product development. Next one, she will use that technique to improve the results.  The lining was all cut from one big piece of satin she’d ordered a yard and a half of for her store years ago. Orange with dots woven into it.

Lining made and stitched to the outer shellIn the process of building the lining, pockets were added and as it turned out, they seemed too close to the edge so a decision was made to add a top piece that would increase the height as well as cover the raw edges.

Picking a piece for the top edgeThis piece was cut into three sections and seamed together. Again, you learn through the process. When she went to make the handles, she realized that a bias joint would have been better. It shows less.

bias join rather than a straight joinIt’s very hard to explain the labor steps involved in constructing anything that is sewn. There seem to be a million little steps that are taken that are invisible to the final product.

Ms. SpoolTeacher was thinking through the whole process, “Maybe it would be better to hold a ‘build-a-bag class’ rather than try to sell them already made.” But, that has a whole ‘nother set of problems.

She’ll just make a few more and see where it goes. The first one is always the hardest. A lot of the “bugs” get ironed out in the process.

Ragged edge after washingFor instance, this little side pocket that seems rather lacking in function now that the whole thing is made; but even so, it adds interest. Maybe a place for a little list for the store, something that wouldn’t be devastating if it were lost.

She was real happy with how the ragged edge turned out. To make a secure seam, she used her stretch stitch so that even after clipping close to the seam, there were still plenty of stitches securing it. It sure would have been pretty with the orange showing. Product development deployment can sometimes have disappointments. A lot to be happy with though, as well. Slouchy angle showing lining

Product Development Deployment

Now she thinks she will add some decorative buttons to secure the straps to the top band. After adding elastic to crinkle it up, the top folds in some getting in and out of it.

Sixteen hours and counting…

When the muse gets a hold of her, it can sometimes turn into madness.

A Magnificent Obsession kind of madness.

Magnificent Obsession

Muse: Madness
Deploy: bring into effective action; utilize.
“they are not always able to deploy this skill”